


Breadcrumb
Student Center Guide
Basic Student Center Navigation Guides
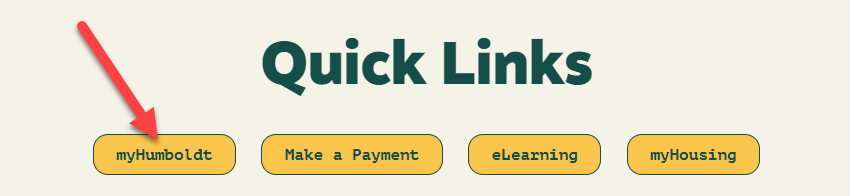
Step 1 - Visit http://www.humboldt.edu. In the upper right hand corner, there are tabs for sites you will access often. Click on the link for myHumboldt.
Step 2 - Next, you will need to log in using your Humboldt username and password.
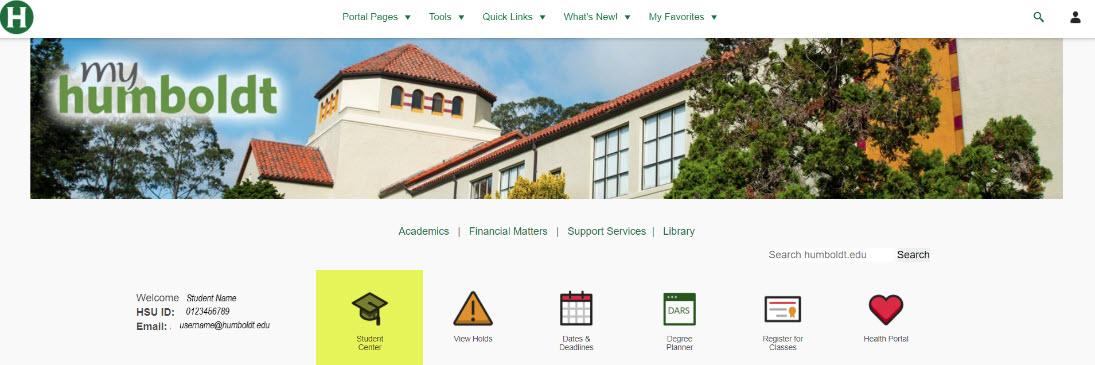
Step 3 - Once you are in MyHumboldt, you will have a quick link in the middle of the page to access your Student Center.
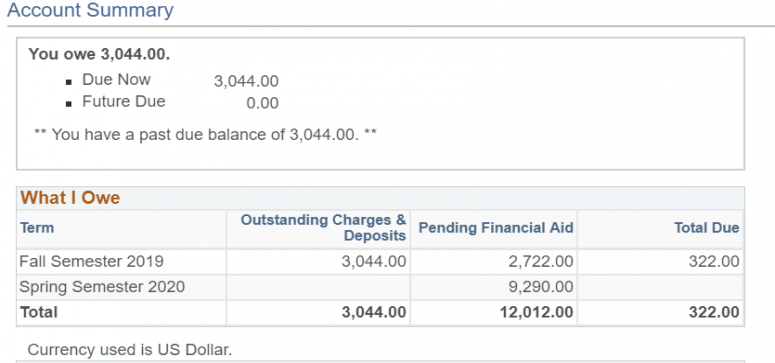
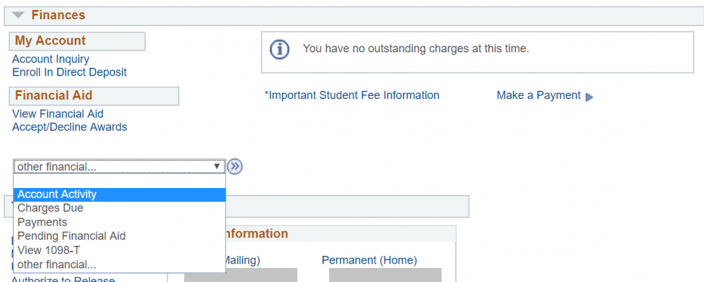
Step 1 - Once you access your Student Center, scroll to the middle of the page to a section titled "Finances," and click on Account Inquiry.
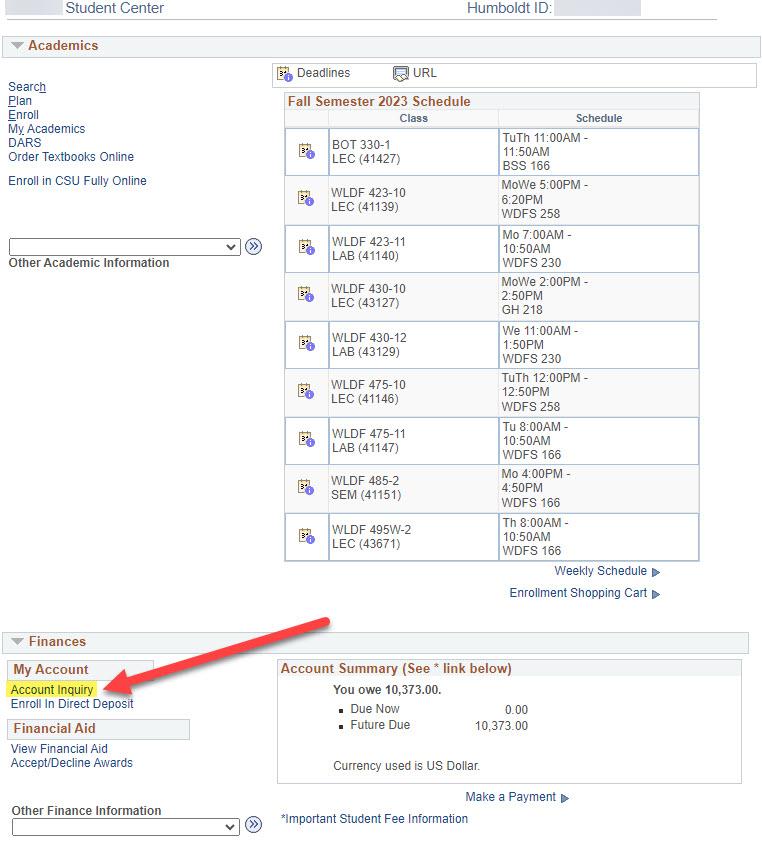
Step 2 - Here, you can see your fees due per term as well as your pending Financial Aid.
**Note: If your Pending Aid is greater than or equal to your Outstanding Charges, then you do not need to make a payment for that term. If the Pending Aid is less than your Outstanding Charges, you will need to pay the difference to avoid getting dropped from your classes. This student will need to make a payment for the Fall Term since their Pending Aid does not cover all Outstanding Charges.
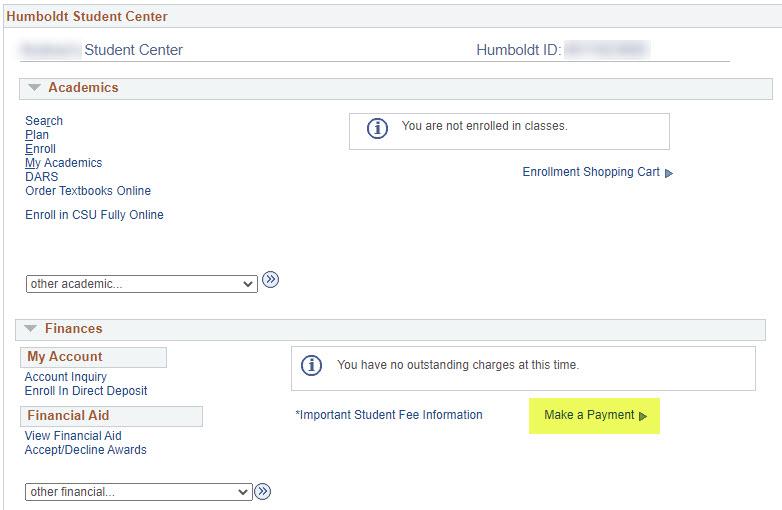
Step 1 - Select "Make a Payment" from your student center and then select the yellow "Make a Payment" button on the next screen.
Step 2 - Select "Activity Detail" from the lefthand menu in the Student Payment Portal.
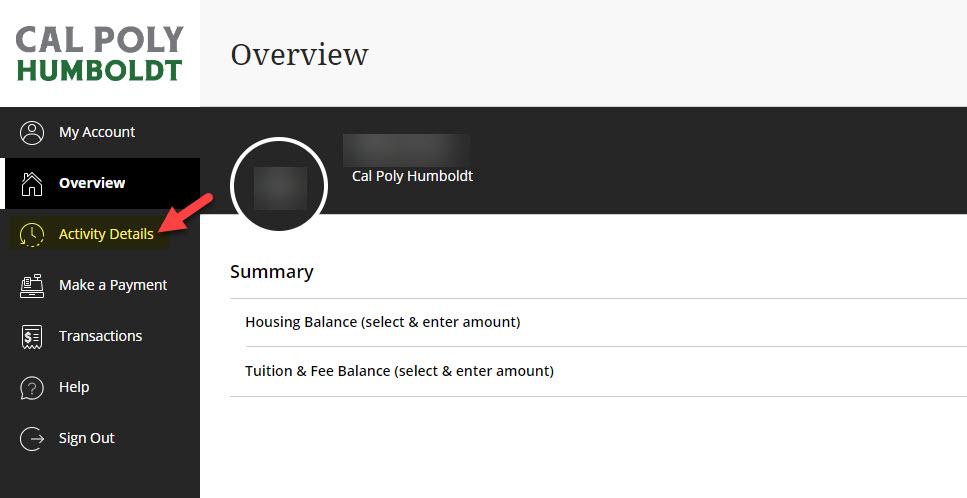
Step 3 - The page will display a snapshot of the student account broken up into different segments.
- "BALANCE SUMMARY" (highlighted in teal) shows an overall summary of all past term nonpaid charges, the current term nonpaid charges (with anticipated aid), and future term nonpaid charges (without anticipated aid).
- "BALANCE DETAIL" (highlighted in purple), consists of a more detailed summary of the nonpaid charges from the current term (and future terms) broken up between charge types (tuition and fees, housing, payment plans, etc.). There is also a line for "Remaining Term Balance Owed" which indicates the out-of-pocket amount due after financial aid has paid the charges.
- "CHARGES BY DUE DATE" (highlighted in red) shows all of the remaining nonpaid charges on the account sorted by the due date to indicate how much is due and when.

Step 1 -Once you access your Student Center, scroll to the middle of the page to a section titled "Finances," and click on Charges Due.
Step 2 - Here, you can see when your fees are due, and how much. ** Note: This page will NOT show your pending financial aid, only fees that have been charged to your account. To see your pending aid, you will need to view your Account Inquiry (see above).
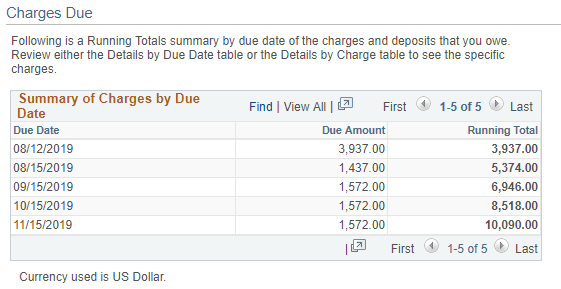
Step 3 - If you scroll lower on the page, you can see details on exactly which fees are due. This student has tuition fees due in August, and housing fees due in September. You can also choose to view different terms so you have a breakdown of fees per semester.

Extra - If you have paid all of your fees, "Charges Due" will be empty.
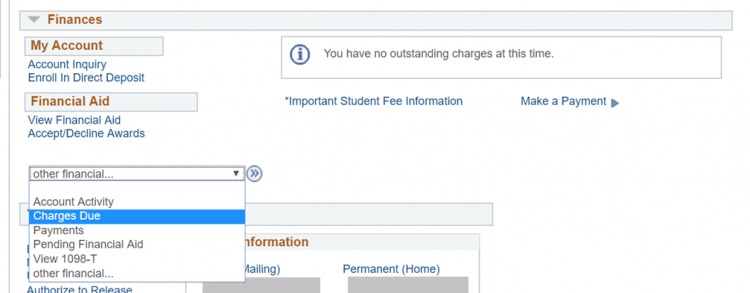
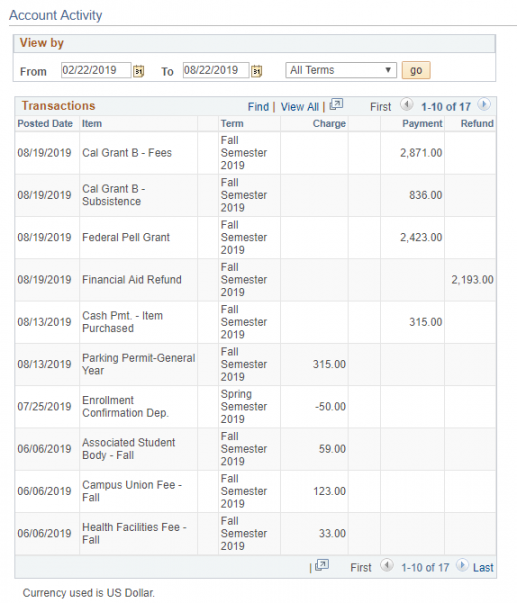
Step 1 - Once you access your Student Center, look for the section titled "Finances." Click on the drop-down menu, select Account Activity, and click the arrow beside it to continue.
Step 2 - On the page for "Account Activity," you will be shown all of the charges, and payments to your account, as well as refunds. This chart will also show the breakdown of your student fees, and how much financial aid is posted to your account. If the chart shows you have a refund, you will be issued a check, or the money will be put into your bank account if you have enrolled in direct deposit on your Student Center.
Step 1 - Once you have accessed your "Account Activity," (see above), you can find the Student Involvement fee. To the right of the $2.00, you will see the option to opt-out.
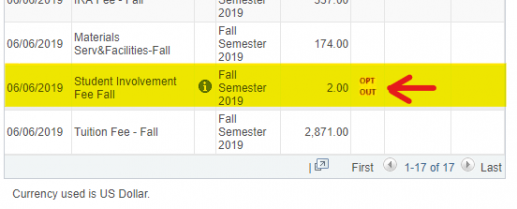
Step 2 - Click on the Opt Out text and you will be asked to fill out a short questionnaire. Once that is completed, you see a new line appear showing -$2.00 (which cancels out the original fee).
Step 1 - Once you have accessed your Student Center, go to the right of the webpage and you will find a section for "To-Do List."
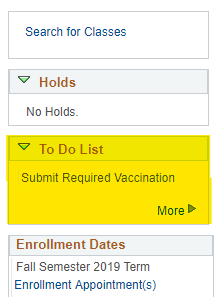
Step 2 - Click on "More" and you will find pending tasks that various departments may need you to complete.
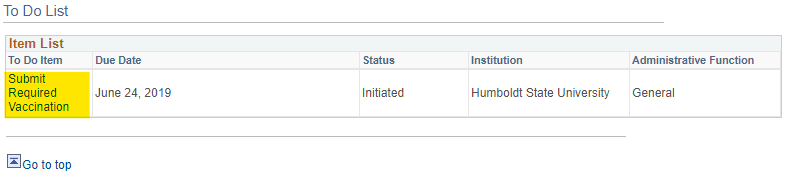
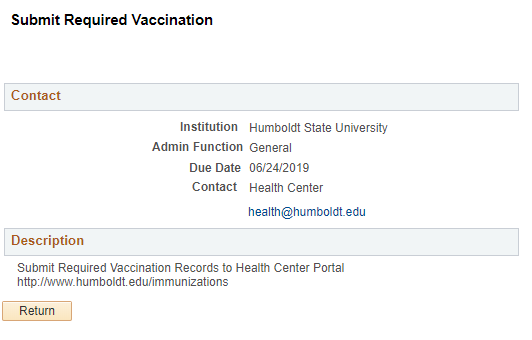
Step 3 - When you click on the item in the list, it will give you more details on how to complete the task. This example shows contact information for the department and includes a link with more information on how to complete the task. Check this section often in case there are things you need to do!
The Enrollment Agreement must be completed EACH semester before you can register for classes. For detailed instructions on how to fill out your Enrollment Agreement, please use this user guide.
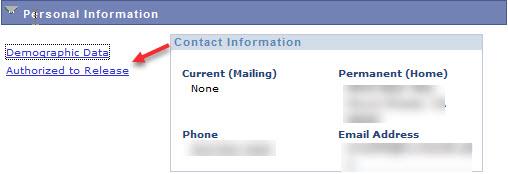
Step 1 - Once you access your Student Center, scroll down to locate the section titled "Personal Information." You can give Humboldt consent to release one or more of your educational records (financial, housing, enrollment) to a parent, guardian, or other family members with a single online form.
Step 2 - You will see a page that describes the different types of authorization you may release. You will give the name of who will have authorization and the Expiration date for the designee. They can have access to your information for up to one calendar year, and you will need to update their expiration date each year.

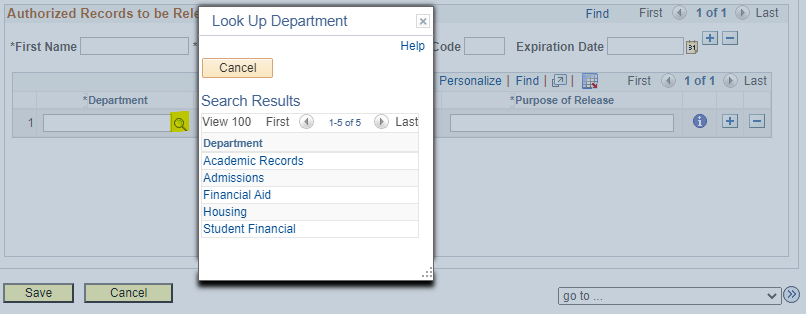
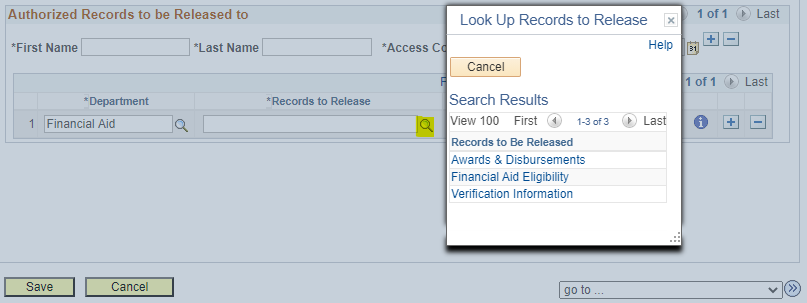
Step 3 - Select the Department and the Records you wish to share.
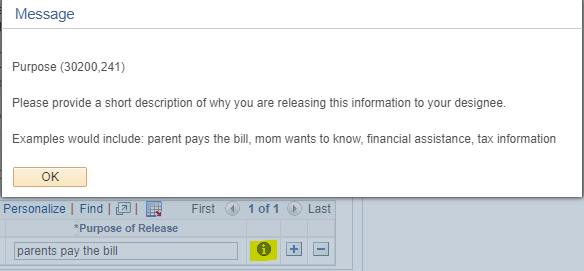
Step 4 - Enter a brief reason for the release of information. This is a freeform text field.
Step 5 - If you want to add more records to share, click the plus button. Click Save when you are done.

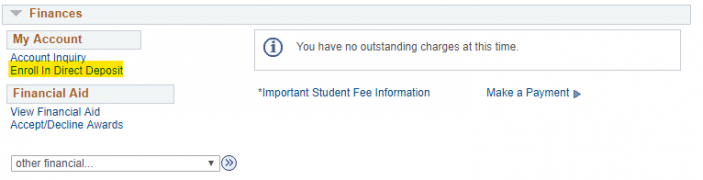
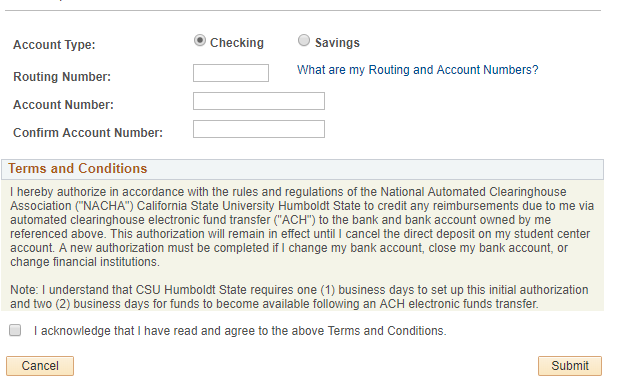
Step 1 - Once you access your Student Center, scroll down to locate the section titled "Finances." Locate the link for Enroll in Direct Deposit.
Step 2 - The next page will ask for your banking information. The account and routing number can be found on the bottom of a blank check. Once you are enrolled in direct deposit, you will get refunds automatically sent to your bank instead of having to pick up a check at the Cashier's Office.
Step 1 - Log into your myHumboldt portal and select "Student Center" (see guide 1 at the top of the page for instructions).
Step 2 - Under the Finances section select "Make a Payment"
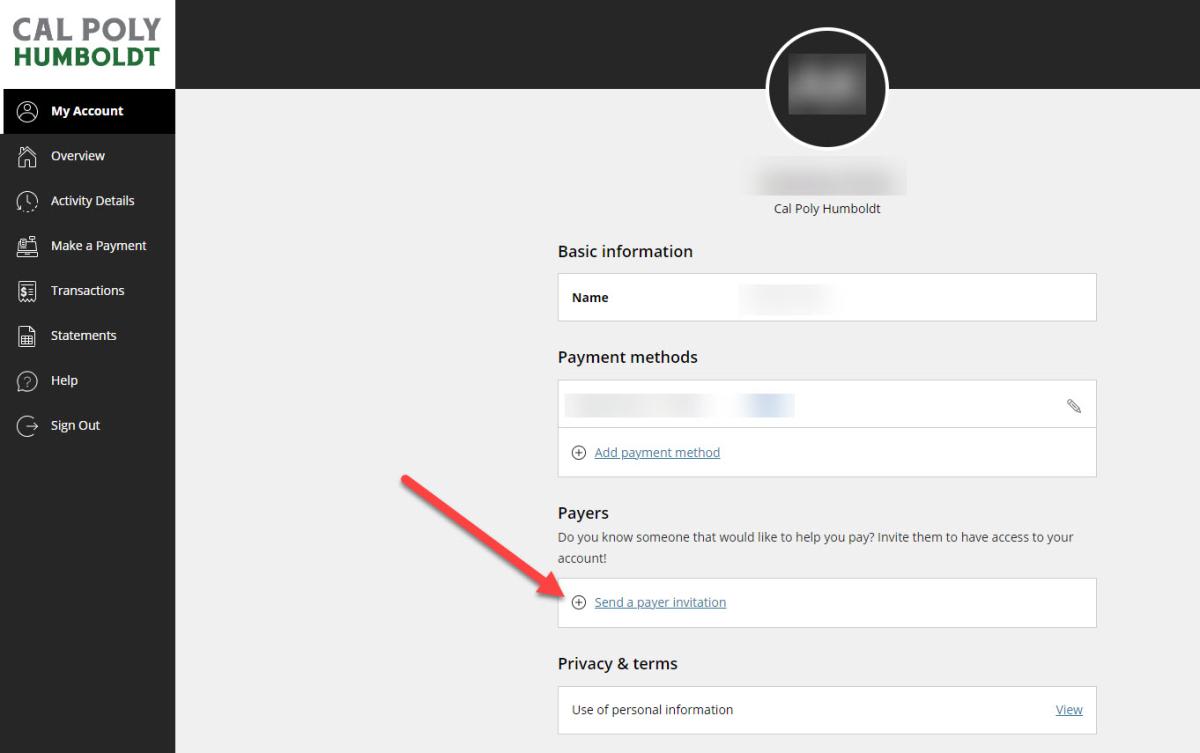
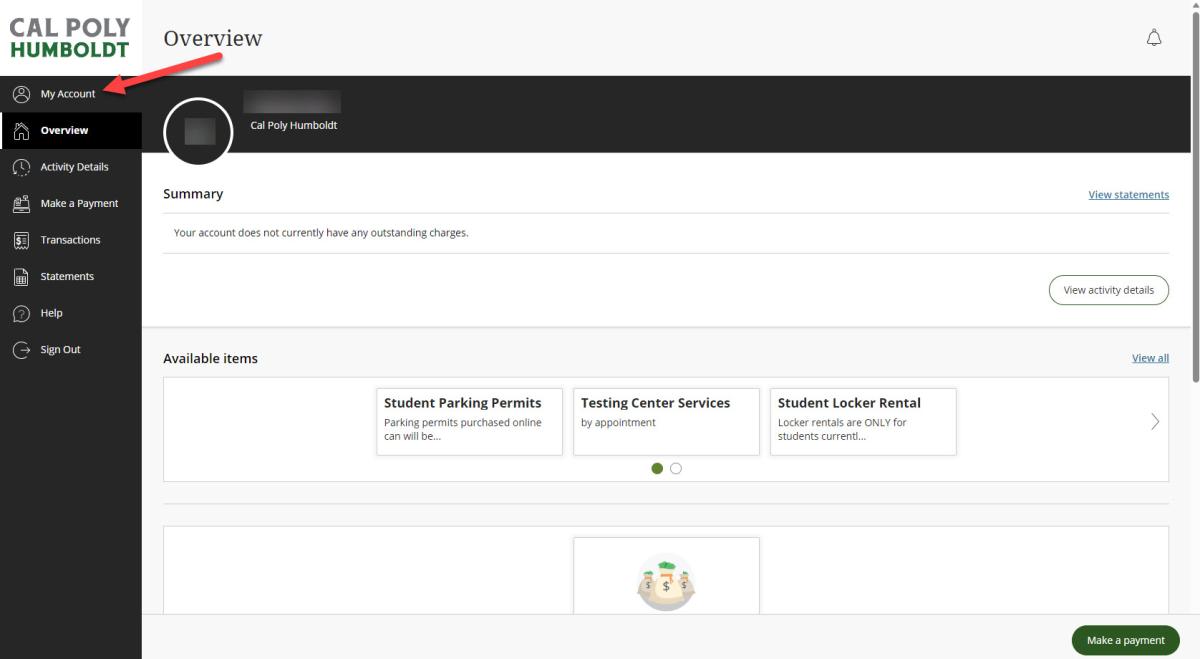
Step 3 - Once the student payment portal has loaded, select "My Account" from the left-hand menu
Step 4 - Select "Send a payer invitation" under the Payers section. This will send an email to the person(s) of your choosing and will provide them their own login information to make payments toward your student account.