


Breadcrumb
DARS Planner Student User Guide
Welcome to the DARS Planner Student User Guide! This is your quick resource for creating and managing your academic plan at Cal Poly Humboldt.
Learn how to build your course schedule, explore degree options, and stay on track toward graduation — all in one easy-to-use guide.
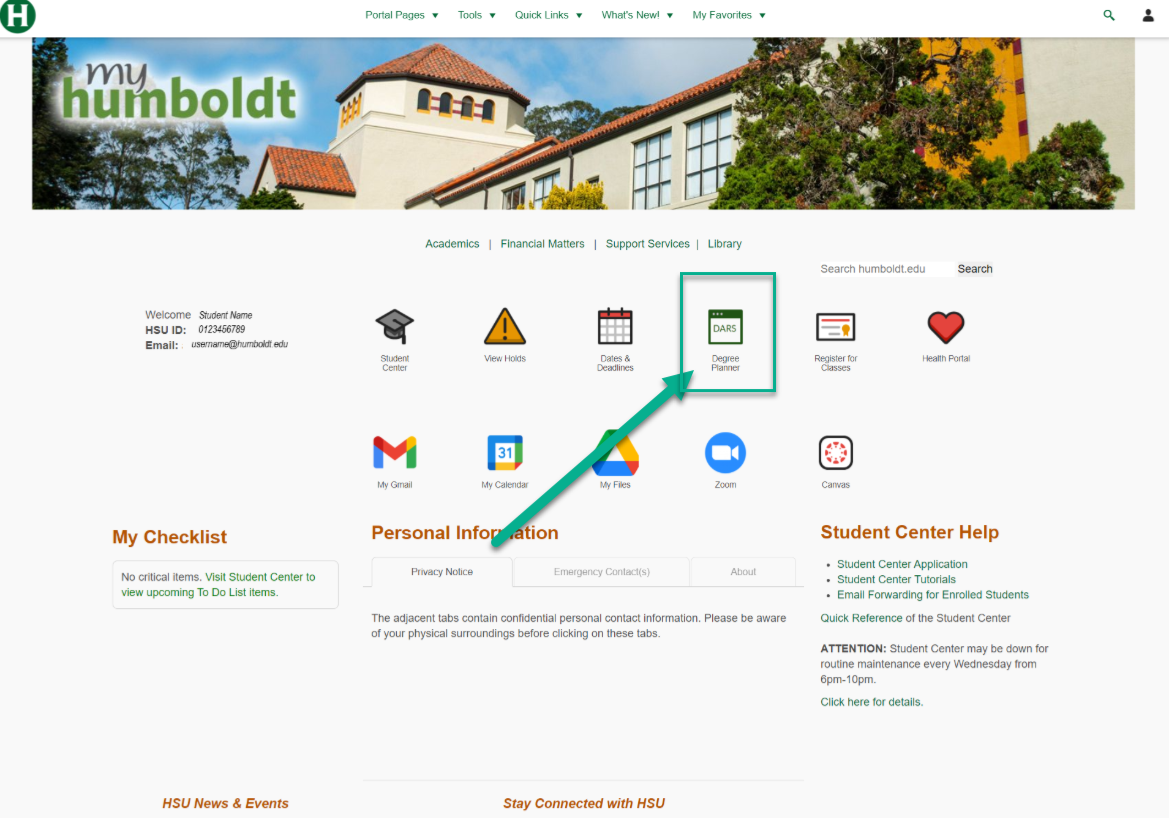
1. Navigate to DARS
Go to myHumboldt
Click on DARS.
2. Create a Plan
Once in DARS, click on the Plans from the top toolbar.
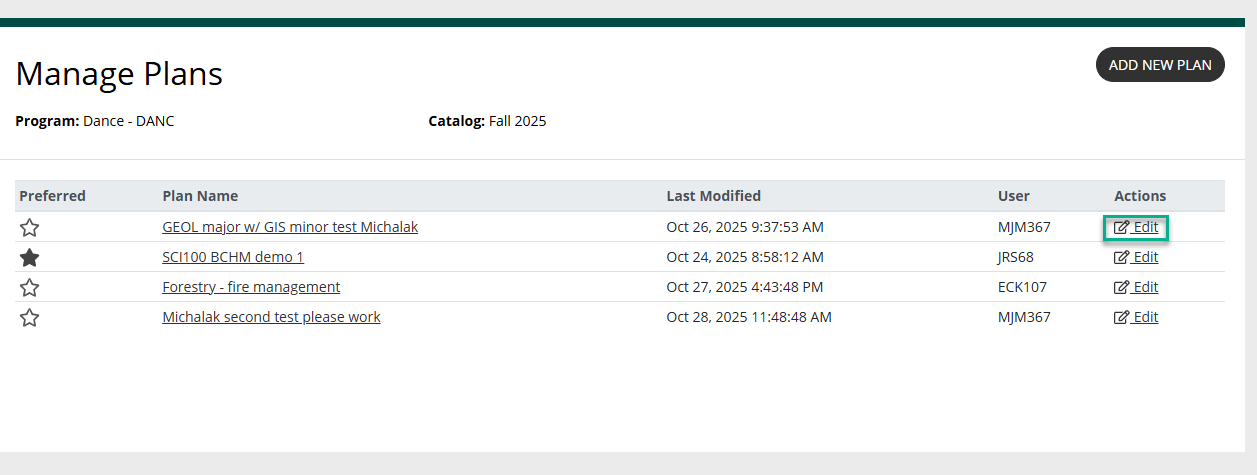
From the Manage Plans page, you can create a new plan or edit an existing one.
To create a new plan, click "Add New Plan".

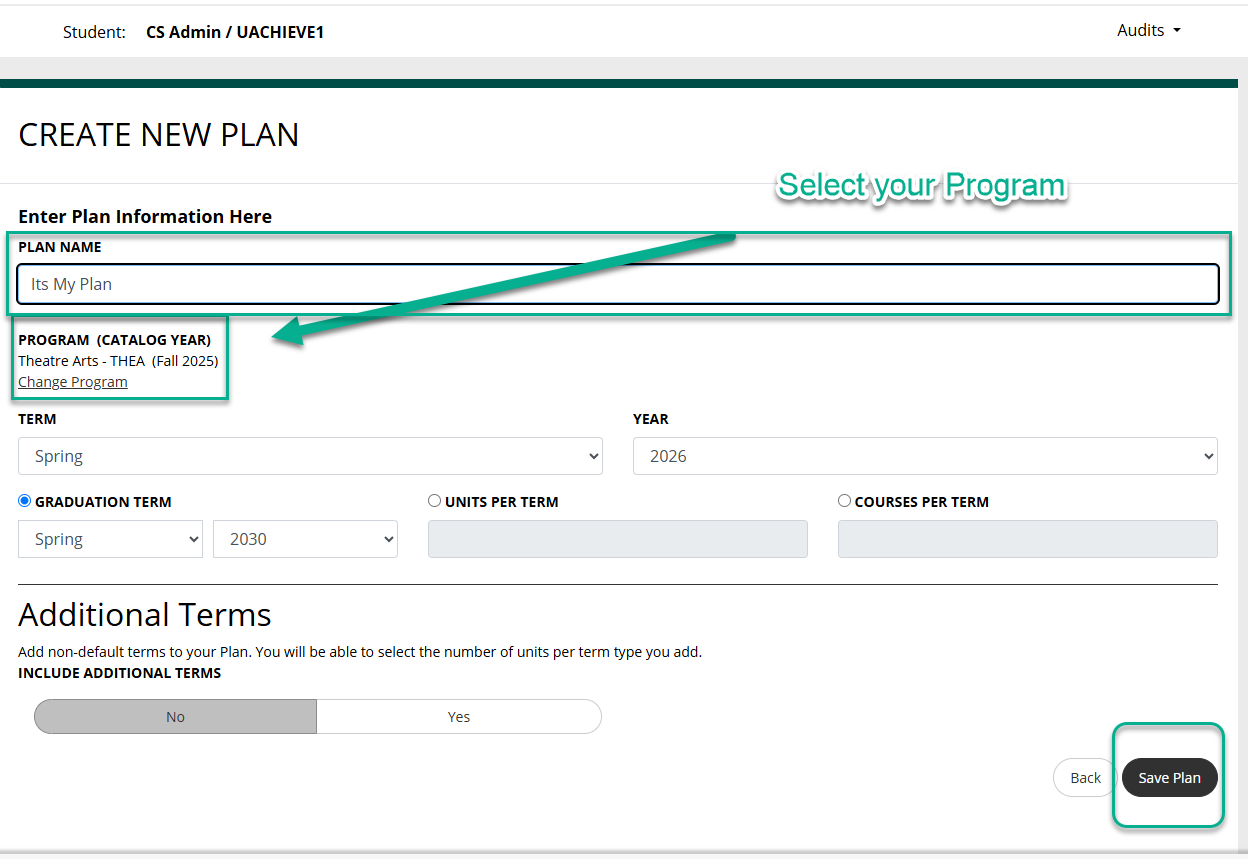
Select the program you want to plan for.
Give your plan a name.
Select a starting term and year
Select the number of years for your plan (default is 4 years)
Click Save Plan
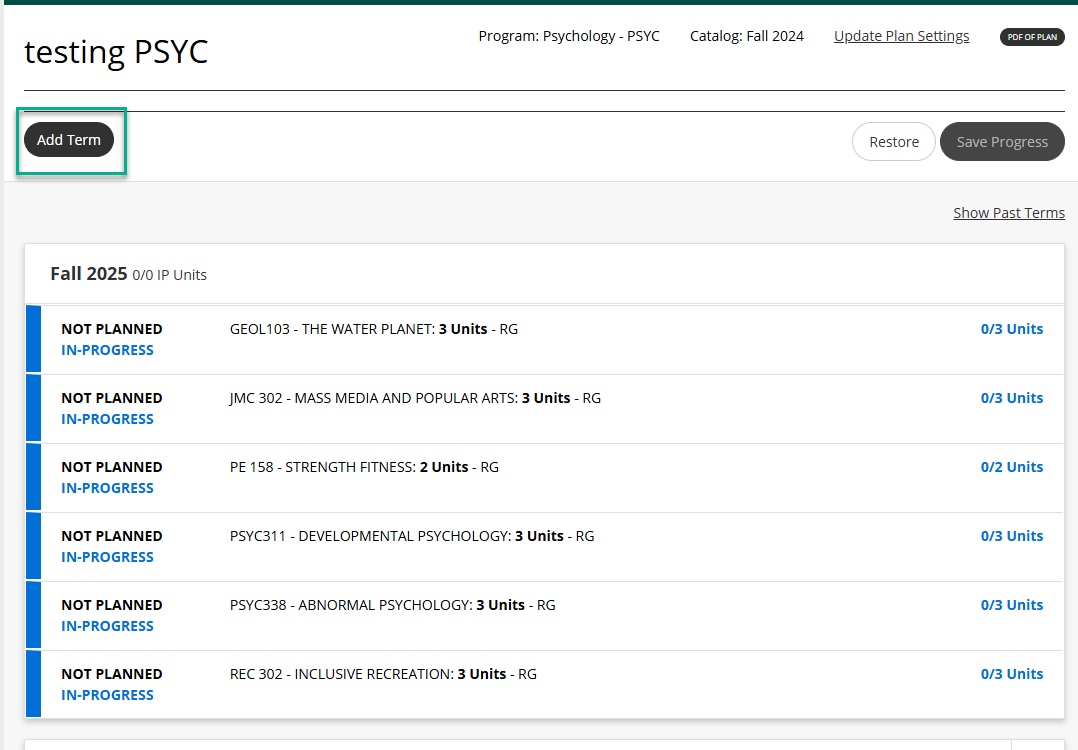
3. Add Courses to Build Your Plan
You should now be in Plan Builder. This is where you will add courses to your new plan. The default view will show your plan on the left and the audit on the right. You can add courses by selecting suggested courses, or by clicking add course at the bottom of the term

Add courses by clicking “add” from the Plan (left side).
Then press select next to desired course
The course will change to purple, signaling that the course has been added to your plan
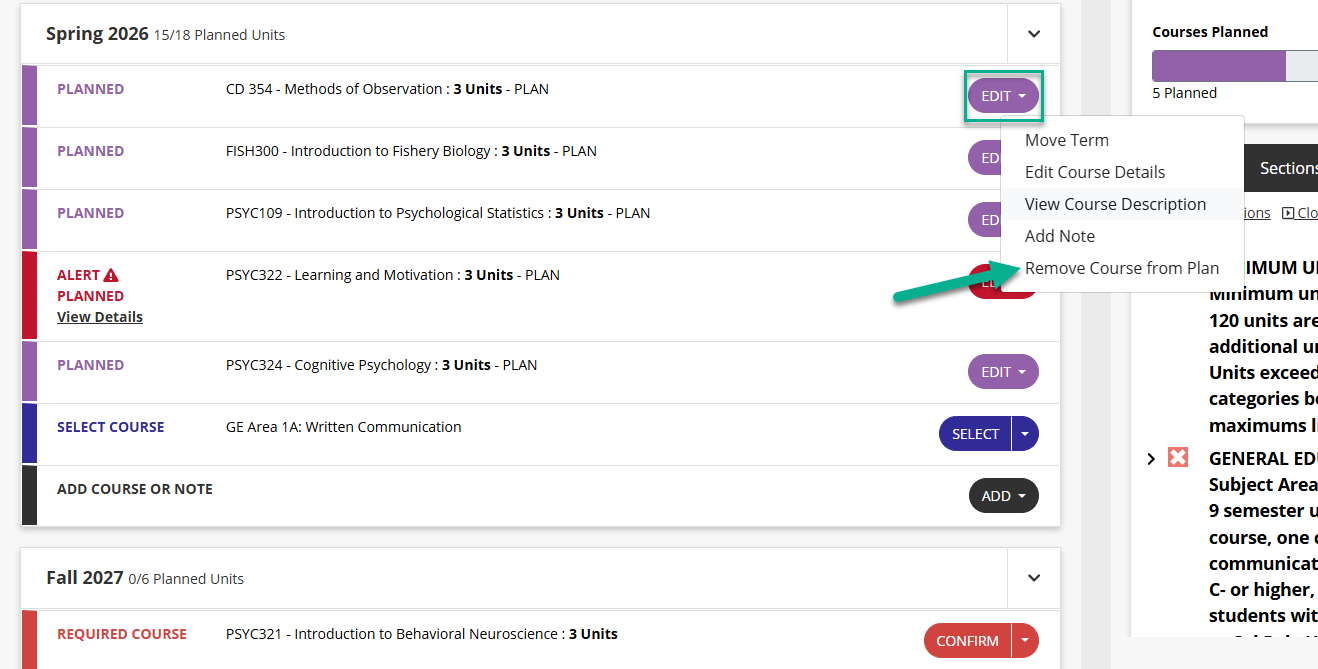
If you need to change when you plan to take the course:
Select Edit, then Move Term.
Select which term you would like to change to.

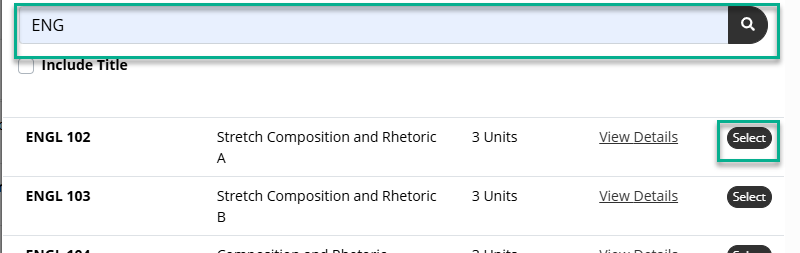
Add Manually
Some courses, such as electives, will not be in your audit. You will need to add them manually.
Click the black "add" button, then click Add Course

Begin to type put the course, and it should appear in a drop down menu.
Click "select” on desired course
4. Save Often!
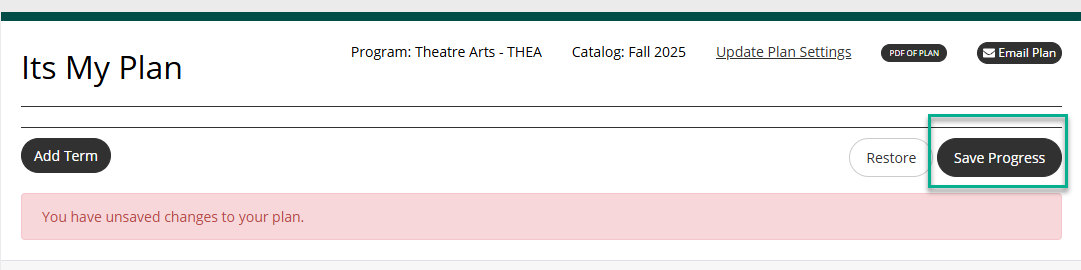
After you have added courses into your plan,
You will see that you have unsaved changes to your plan
Above the banner, you will press ‘Save Progress
Check that the classes you added meet major requirements.
Note: It's important to save your changes so any requirements that are met by the course you added can be removed from your plan.
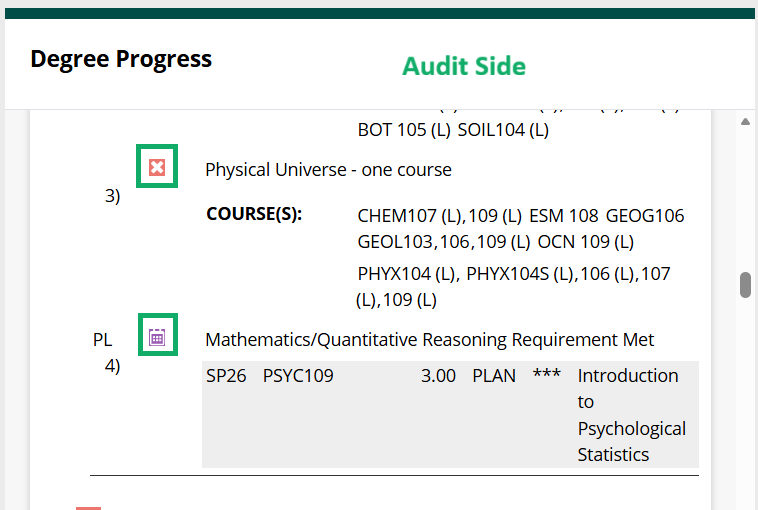
Fun Fact: Areas satisfied by planned courses will have a purple box with a calendar on the audit side. A red box with an X inside indicates an unfulfilled area.
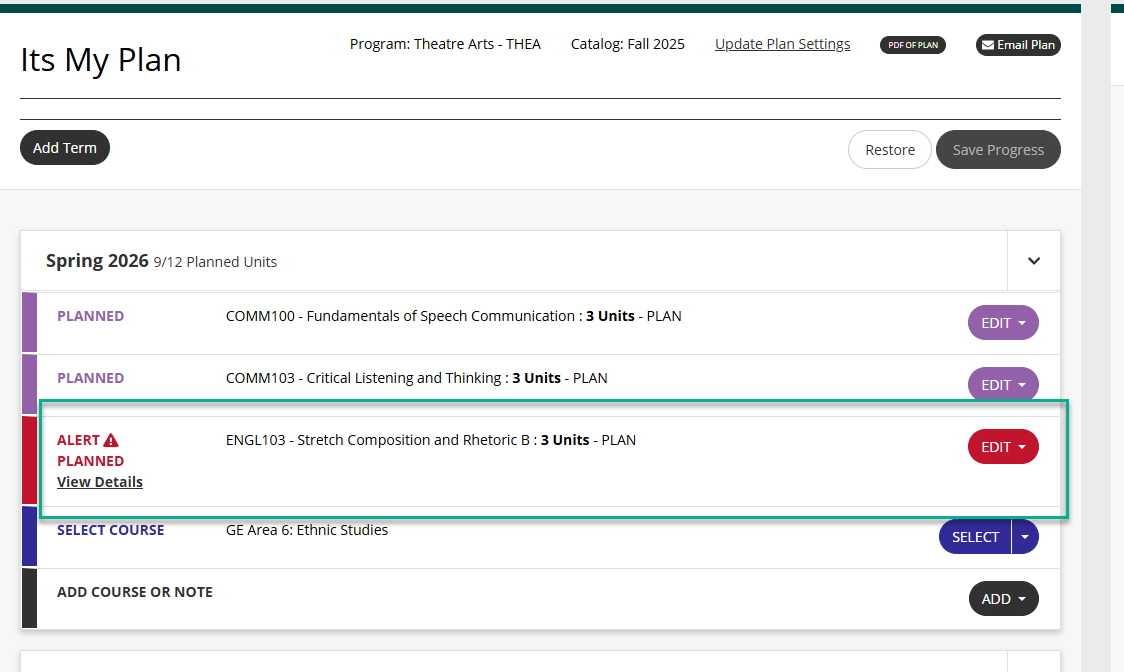
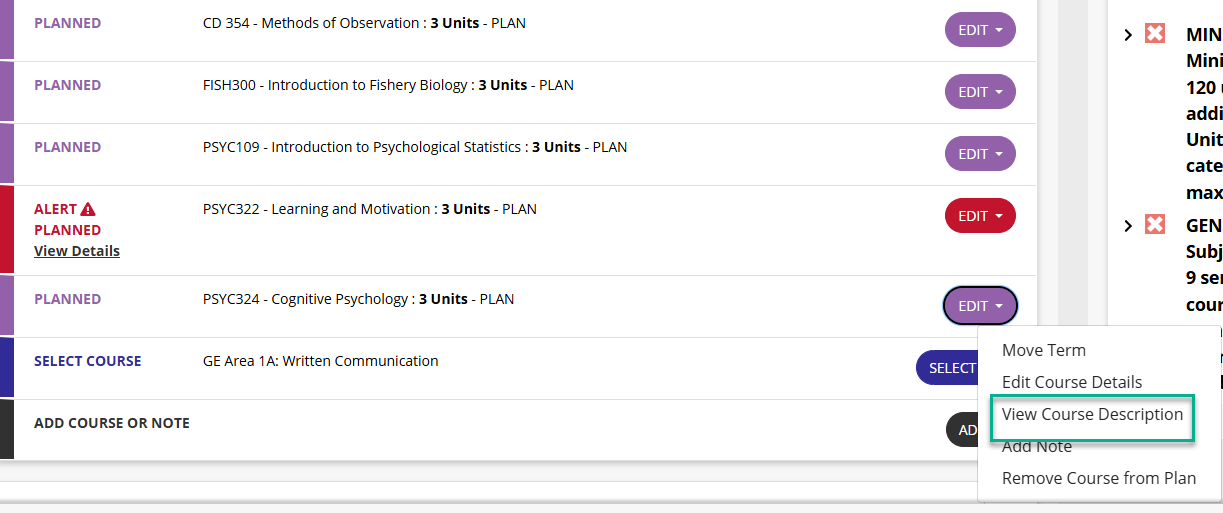
Be sure to check the plan side for alerts!
If a course displays an "alert planned" it is an alert there may be an issue with planning this course. Hover your cursor over "view details" for a hint: in this case, the course is not offered during this term.
Also, click on “view course description” for more details including, course description, prerequisites and availability grid.
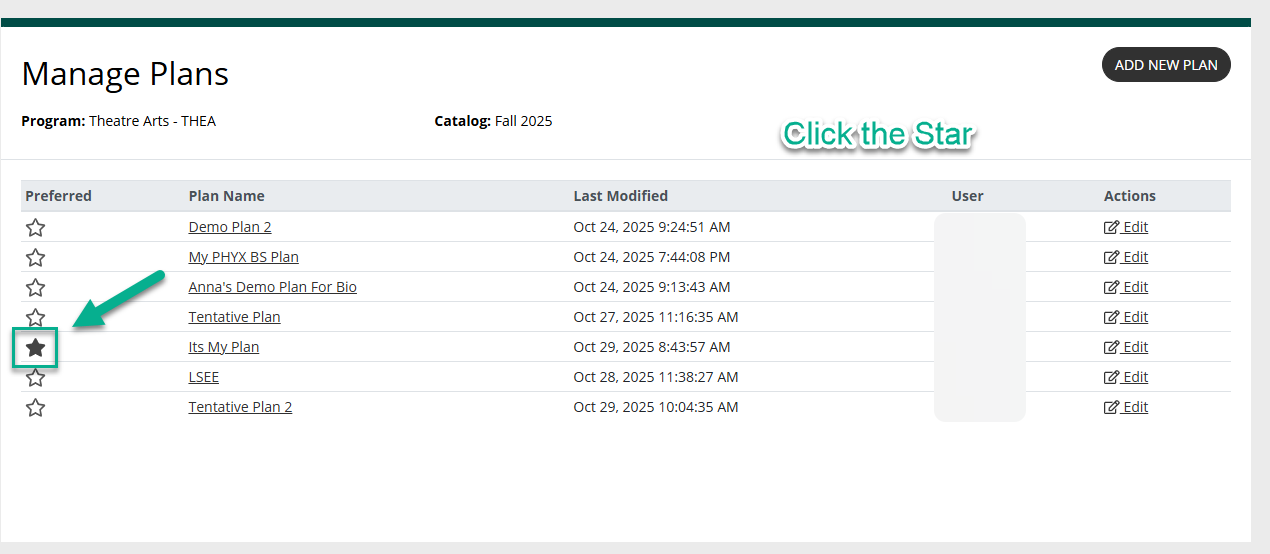
5. Mark Your "Preferred" Plan
When you are happy with your plan, return to your Manage Plans screen and choose to make your new plan preferred—or just leave it as an option.
Click on a "star" to mark a plan as preferred.
If you want to try out some other options, copy your preferred plan, and then make changes to the copy.
Click Plans in the toolbar,
Next to your preferred starred plan click the Action drop-down menu.
Click “Copy”.
Give your new plan a name and you are ready to start planning!
If you decide you like the new plan better, click the star icon to mark it your preferred plan.
Beyond the Basics
Click the Add Term button under the plan title.
2. Select the Term, Year, and Units Per Term. Then click Add Term.

The added term button will be placed based on the year
DARS Degree Planner allows you to create multiple plans to explore different major options - but keep in mind that each plan is tied to only one major (plus any declared minors) at a time. To create a new plan to explore another pathway, you can follow the steps in the Manage & Maintain Your Plan video. When exploring other plans, it’s important to keep your preferred plan "starred". Your preferred plan will be used by the university to predict course demand.
To delete an unwanted course from your plan:
- Click the Edit button next to course you want to delete.
- Click Remove Course from Plan. (You will be prompted to confirm deletion.)
- Click Yes to confirm you're removing the course to
- Save your changes.
You can delete optional plans, but not your preferred plan. If you have built a plan that you like better than your current preferred plan, click the star for the new plan to make it preferred.
- Click on Plans in the toolbar. find the plan you want to change.
- Select delete from the Action field.
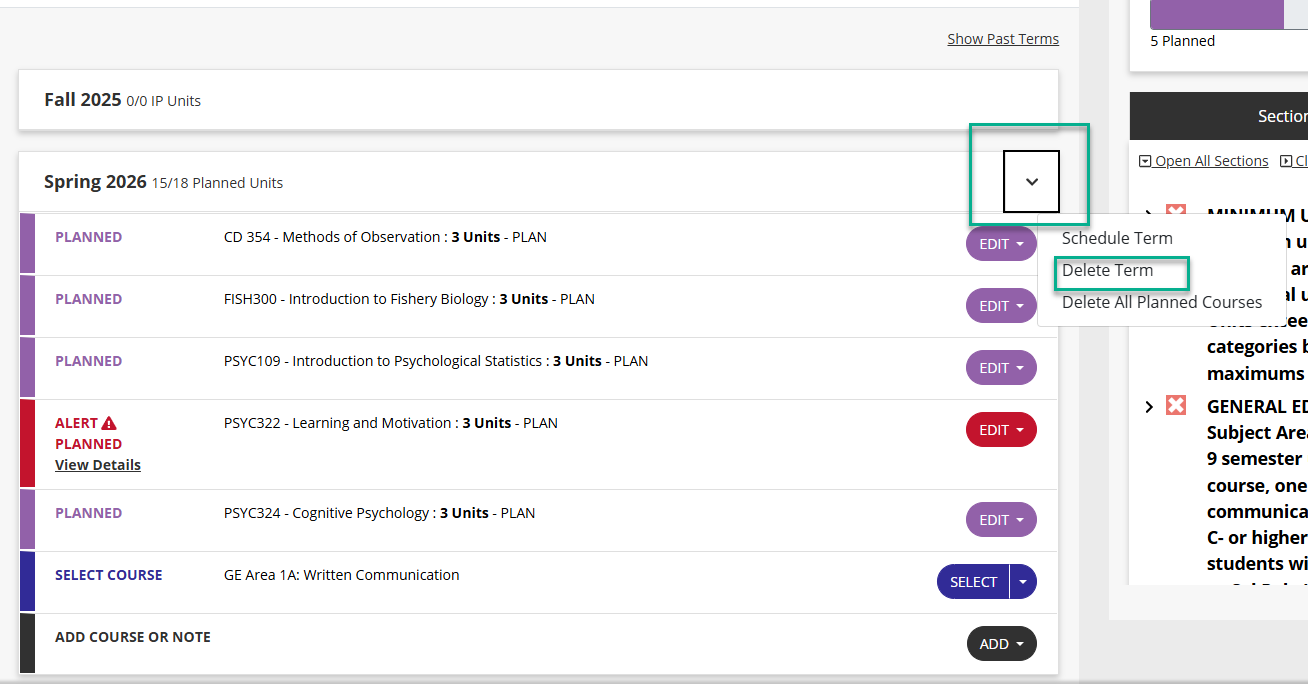
To Delete Term:
- Click the arrow button next to term name.
- Click Delete Term
- Click Yes to verify you want to delete the term and all courses within it.
If your existing plan needs to change, make the updates as soon as you can. DARS Degree Planner works interactively in real time, so you can see how these changes will impact your overall plan. Discuss changes with your academic advisor.
Go to Manage plans then click edit next to plan you want to edit. You can rename or copy a plan. Note: you can not delete a plan that is marked as preferred.
There are known accessibility barriers in the use of this product. While many issues have been corrected, improvement work continues. For assistance, please contact:
Office of the Registrar
(707) 826-4101
email: records@humboldt.edu
Academic & Career Advising Center
(707) 826-3341
email: advising@humboldt.edu
For Faculty & Staff DARS tool see: Faculty Center Help