Breadcrumb
How to Create and Share a Video/Audio Recording in Panopto
Create a Video/Audio Recording in Panopto
You can create a video in Canvas and in your browser. Choose the option that will work best for you.
- In Canvas, click the Panopto Video link in your course's navigation.
- Go to Panopto. You will be asked to sign in using your Humboldt credentials.
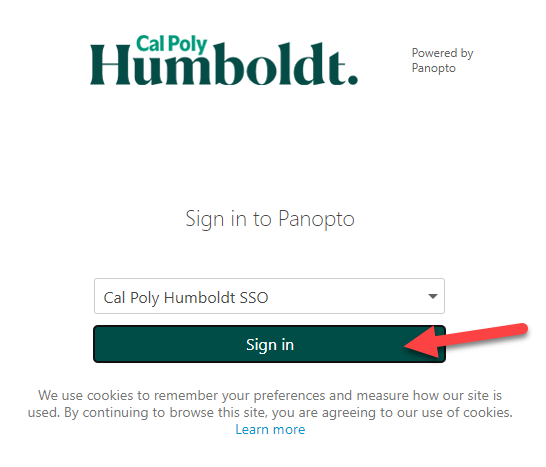
Once you are logged in, go to the left navigation bar and click on + Create.
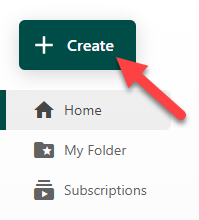
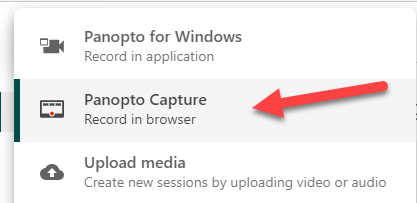
Select Panopto Capture from the pop-up menu.
In the window that appears, your webcam and microphone should automatically be selected.
If they are not:

Click on Audio and select the audio device you want to use.
Image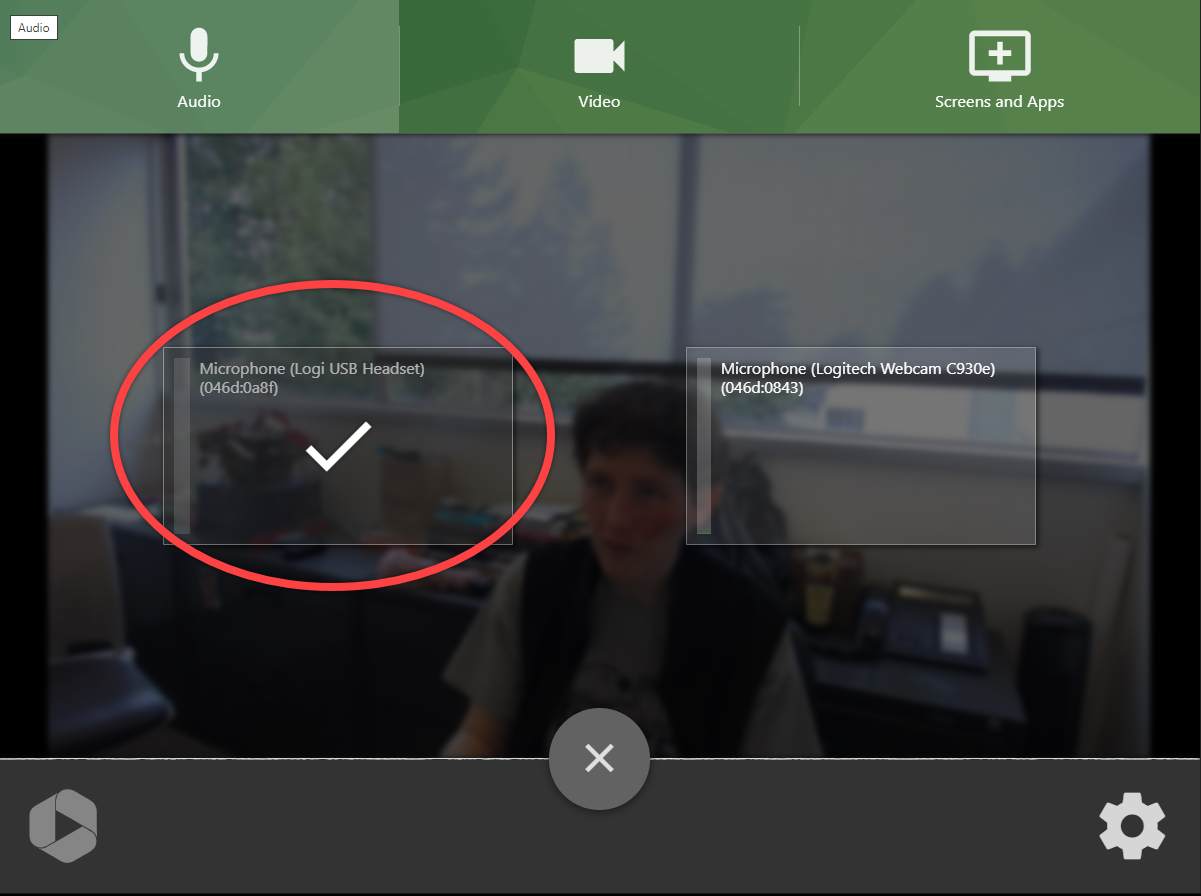
Click on Video and select the camera you want to use.
Image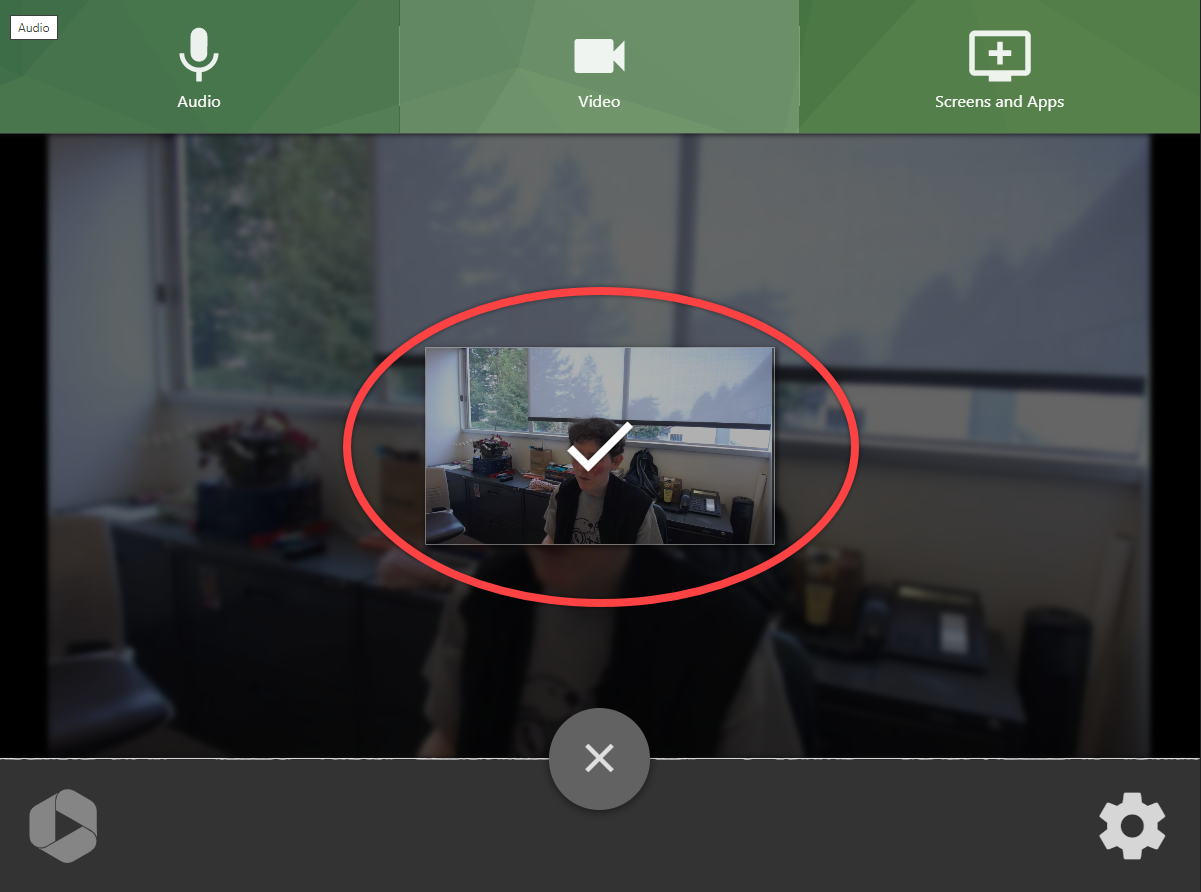
Note: If you only want to record your audio, click on Video, hover over the video clip and click on Remove.
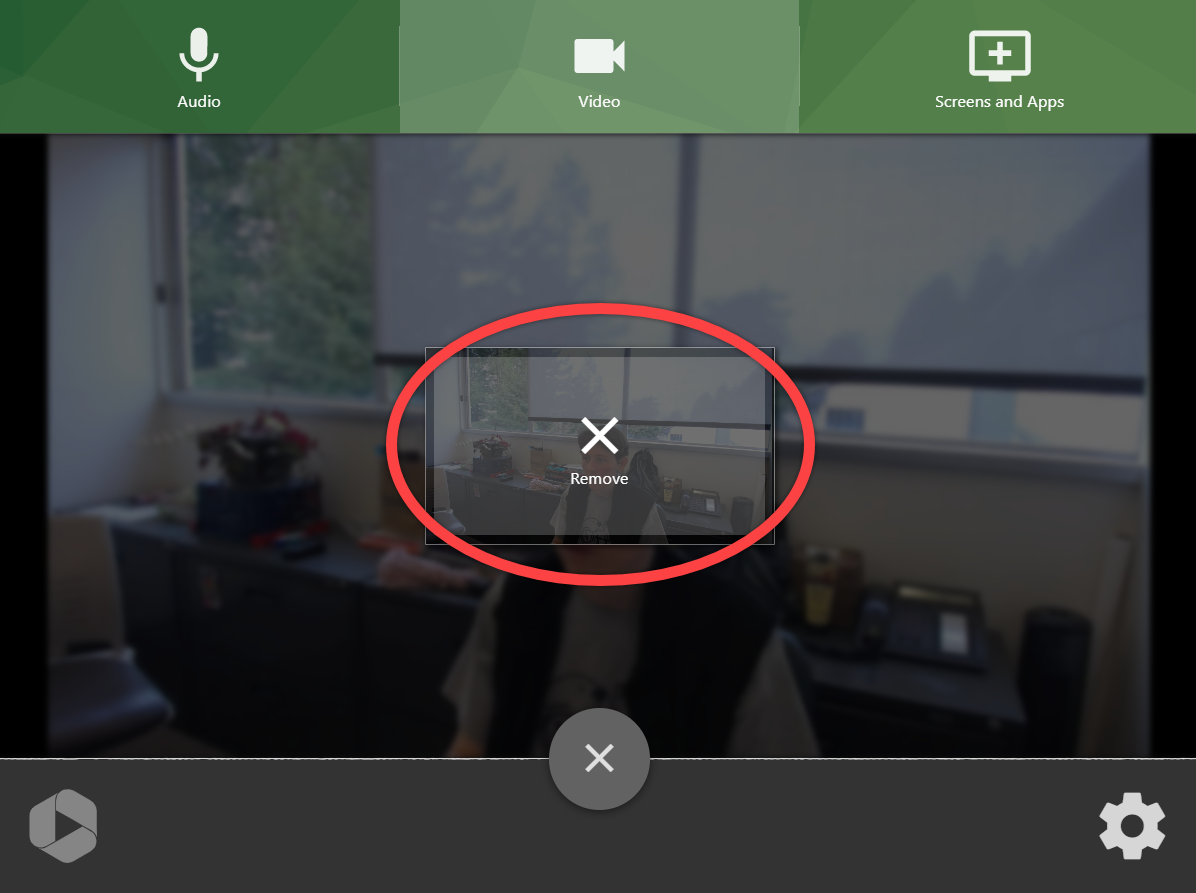
Click on the gray X button to close the Audio/Video menu.

To start your recording, click on the big red button. Click on the button again to end your recording.

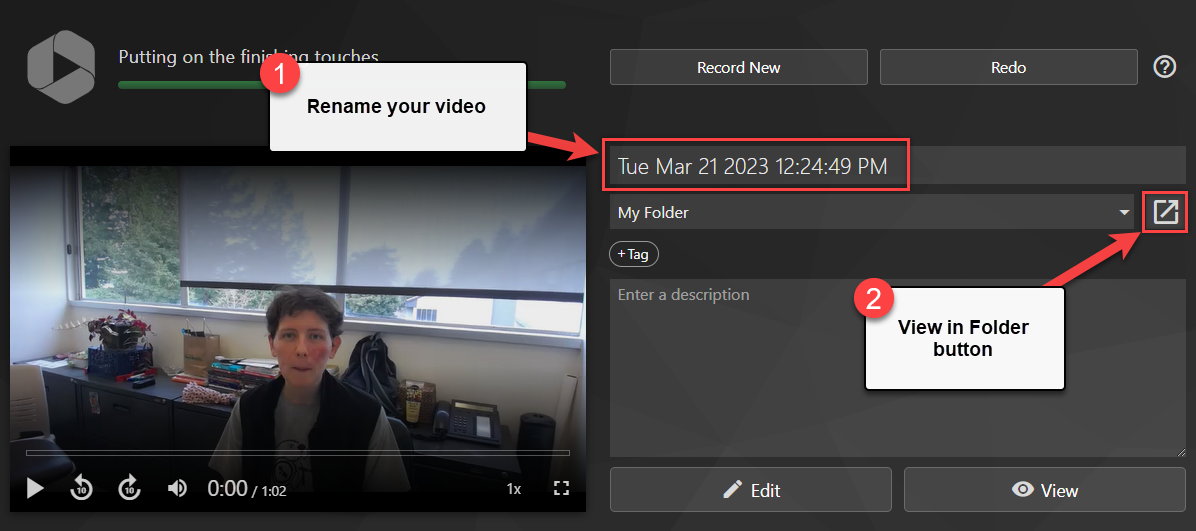
After you have finished your recording, name your video and then click on the View in Folder button.
Upload Videos To Panapoto
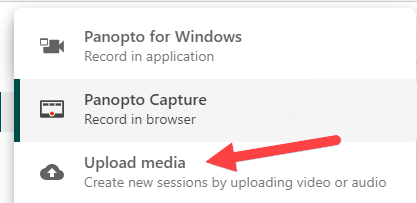
Click Create and Upload media.
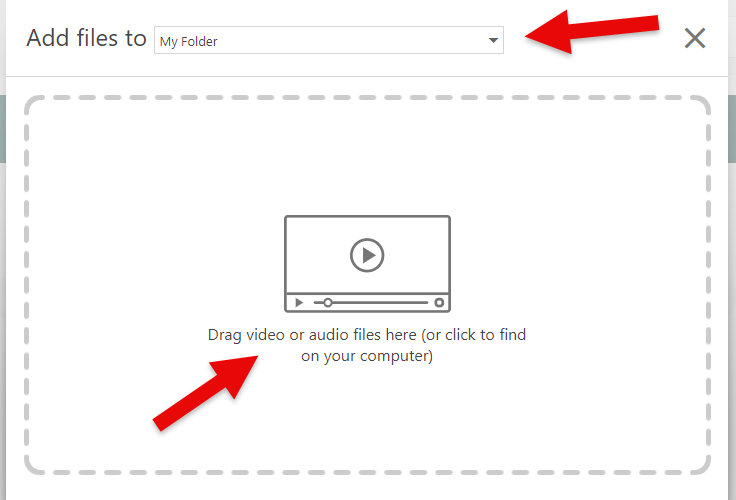
Click the box to navigate to your .mp4 file and then click Open, or drag your file and drop it in the box. You can also choose which folder to add the video file to. Then close the popup window.
Set Your Video’s Permissions
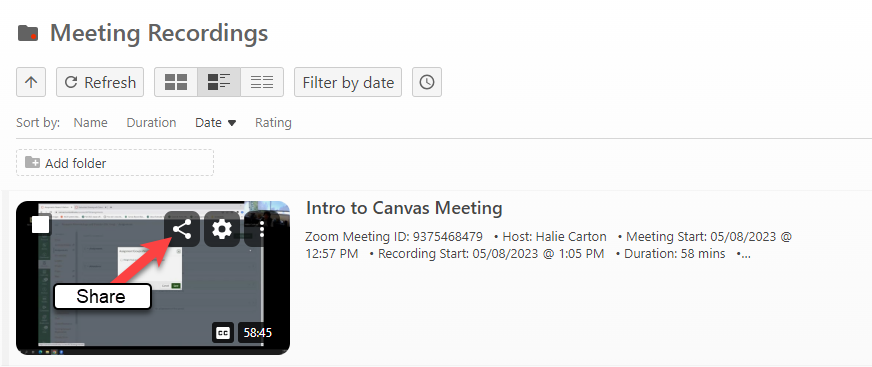
Hover your mouse over the video until another menu appears, and then click on Share icon, which looks like a angle with dots.
In the pop-up window that appears, under Who can Access this video, click on Change.
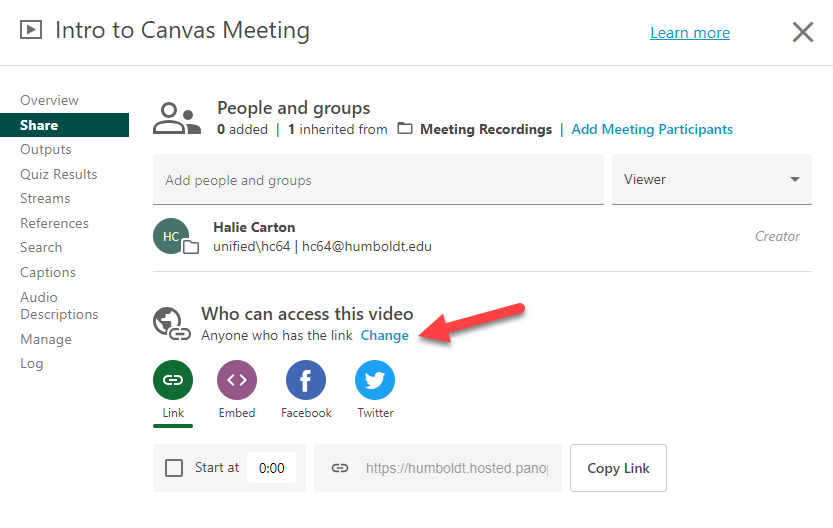
Select Your Organization (unlisted) from the drop-down menu.
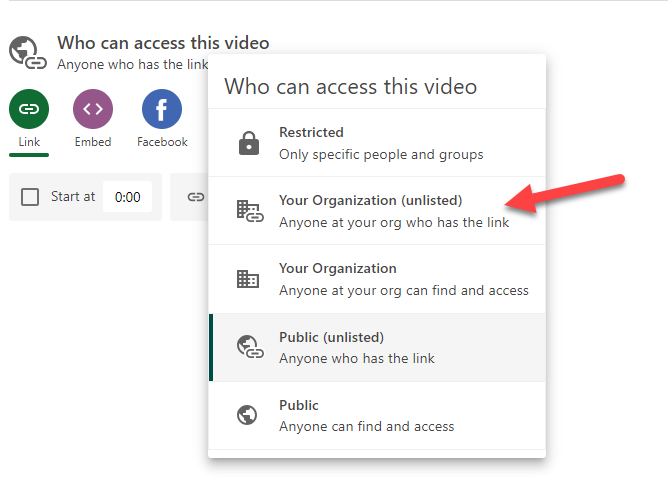
Share Your Video
There are two ways to share your video on Canvas: Linking or Embedding.
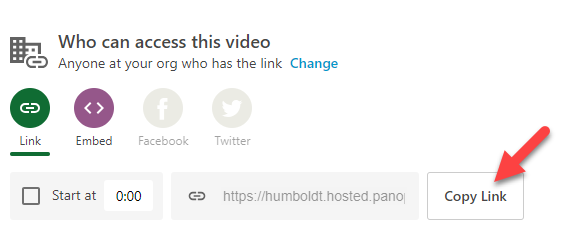
Link Your Video
Click on the Copy Link button.
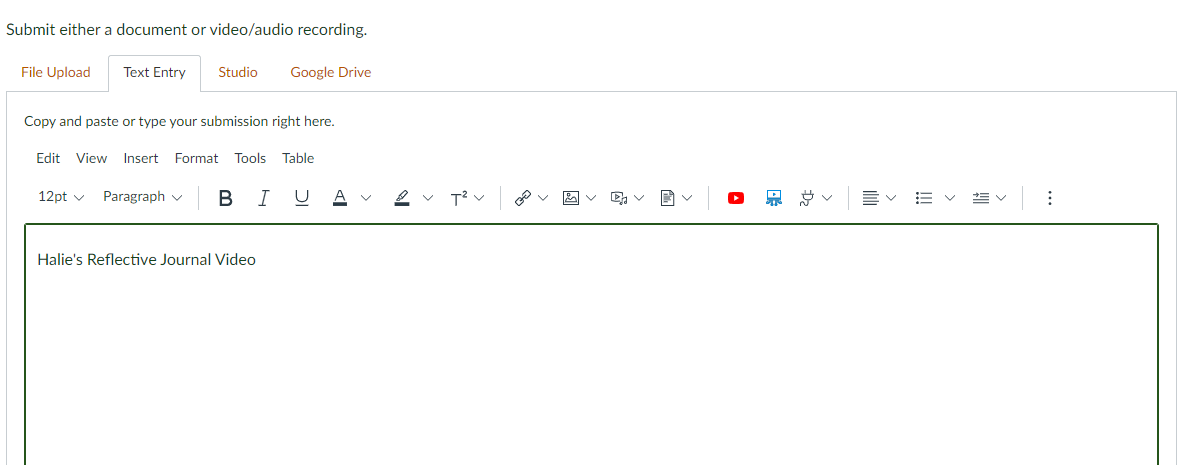
Go to your Canvas course. Type out the name of your video into the Assignment Text Entry box, and then select your text.
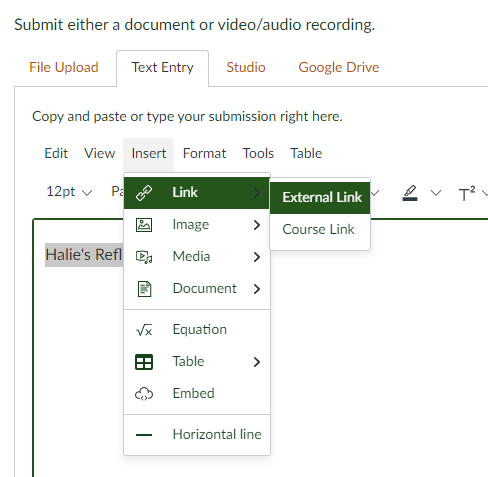
Add your link to the text by clicking on Insert > Link > External Link.
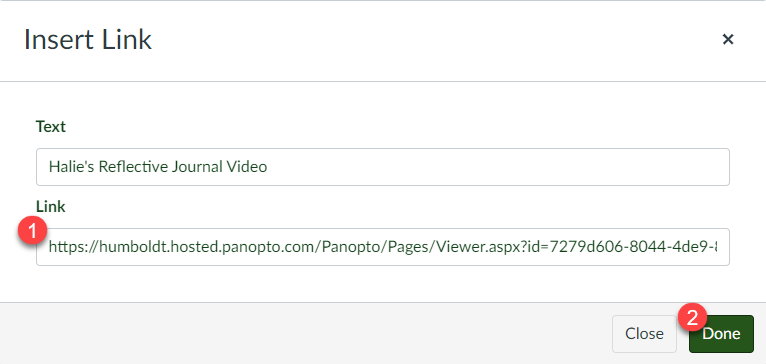
In the Insert Link pop-up window, copy your Panopto video share link into the Link field and click on Done.
Now you can submit the Assignment and your video will be available to your teacher.
Embed Your Video
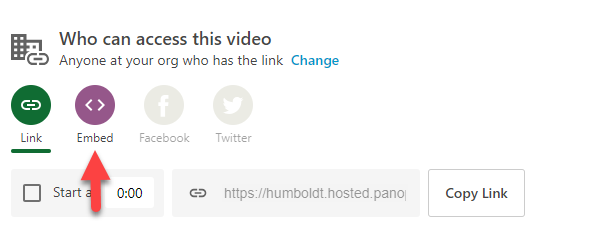
Alternatively, you can instead copy the embed code from Panopto. In the video’s Share pop-up window, click on Embed.
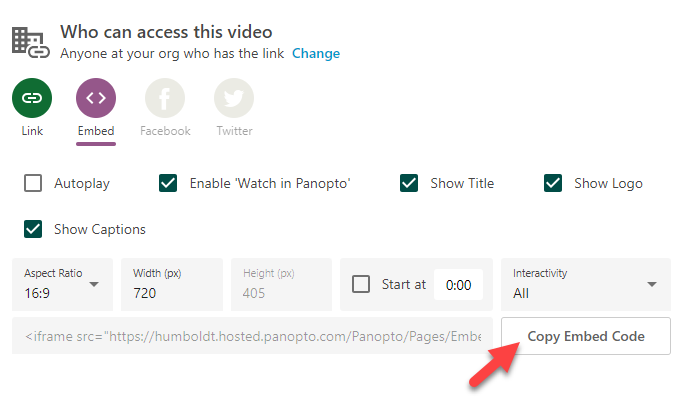
Then, click on the Copy Embed Code button.
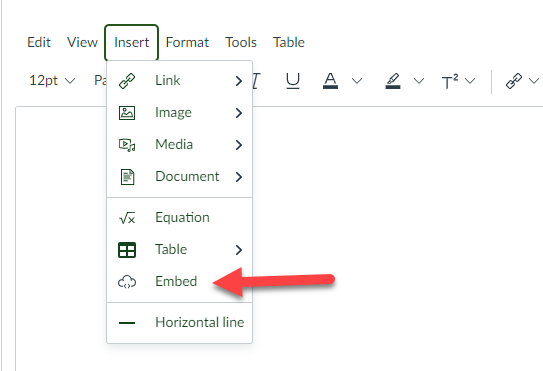
Go to your Canvas course, and in the Assignment Text Entry submission box, click on Insert and select Embed from the drop-down menu.
Paste the embed code into the pop-up window that appears and then click on Submit.
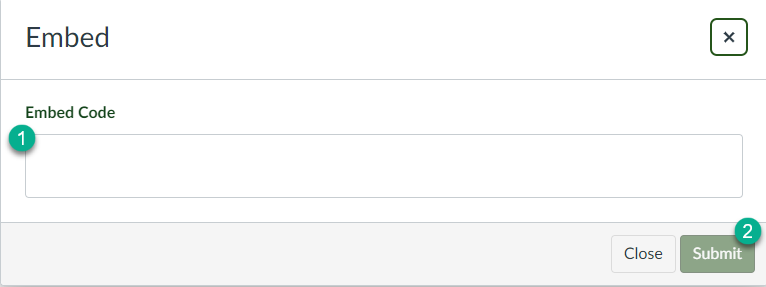
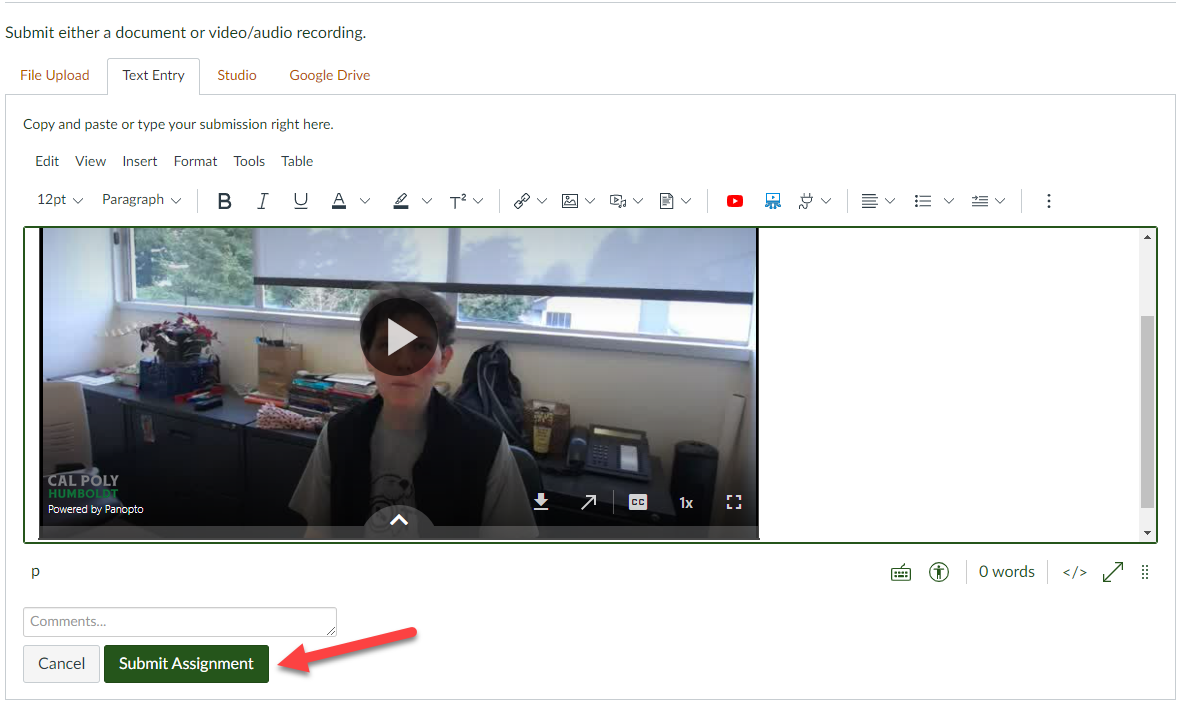
Your video is now embedded, and visible, in the submission box. Now you can submit the Assignment and your video will be available to your teacher.
