Breadcrumb
How to Automatically Share Zoom Lectures to your Canvas Course Using Panopto
This is a three step process.
Step 1: Create a Unique Meeting ID for Your Course’s Zoom Lectures
From your myHumboldt page, click on the Zoom icon.
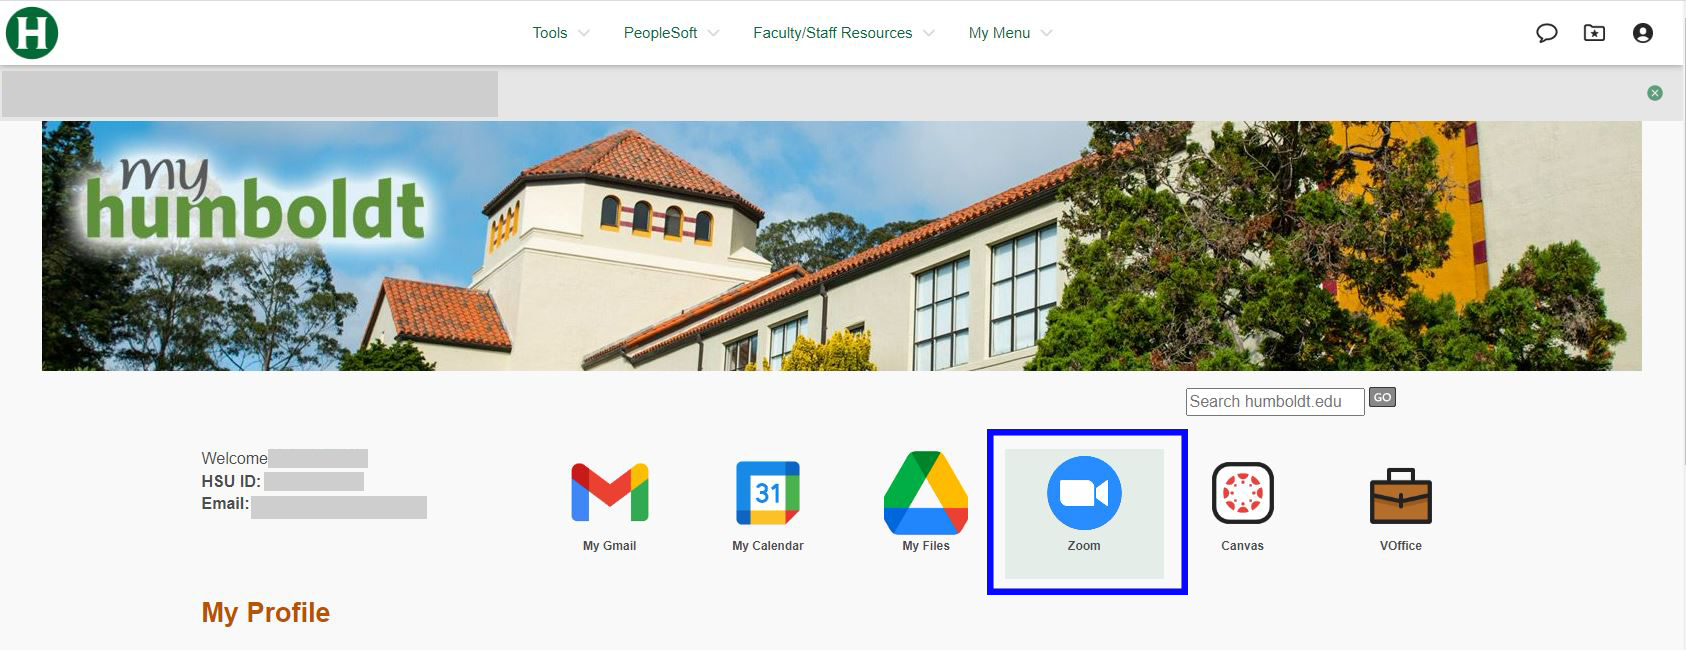
This will take you to your Cal Poly Humboldt Zoom account.
From the Navigation sidebar, go to Meetings.
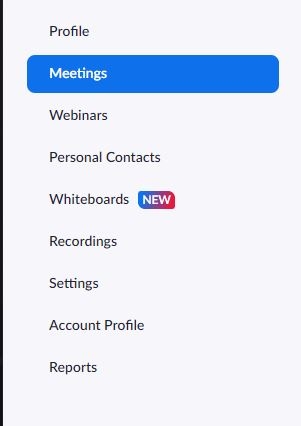
Click on the Schedule a Meeting button.

On the Schedule Meeting page:
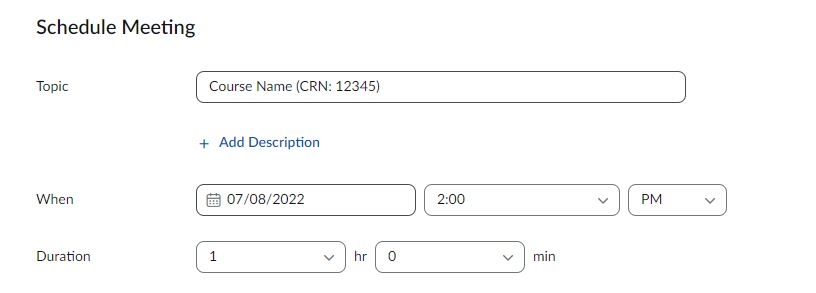
- In the Topic field, enter: “[name of your course] Lecture.”
- In the When fields, enter the first Date and Time your course will meet.
- In the Duration field, select your course’s duration in hours and/or minutes.
Next, select the Recurring meeting checkbox. More fields will appear.

From the Recurrence dropdown menu, you have four options: Daily, Weekly, Monthly, and No Fixed Time. Courses usually meet weekly, so it is suggested that you select either Weekly or No Fixed Time (which allows you to meet anytime using the meeting link and ID).
Weekly

If you choose Weekly, select the number of weeks the course will run from the Repeat every dropdown menu. In the Occurs on section, select the checkmark next to the days your course meets.
No Fixed Time
Simply select No Fixed Time from the Recurrence dropdown menu. No other information is needed.
In the End Date section, select the By radio button and enter the semester End Date into the Calendar field.
You can also require registration, set up a Waiting Room, etc. and choose whether Video will be automatically on when starting the meeting, or not.
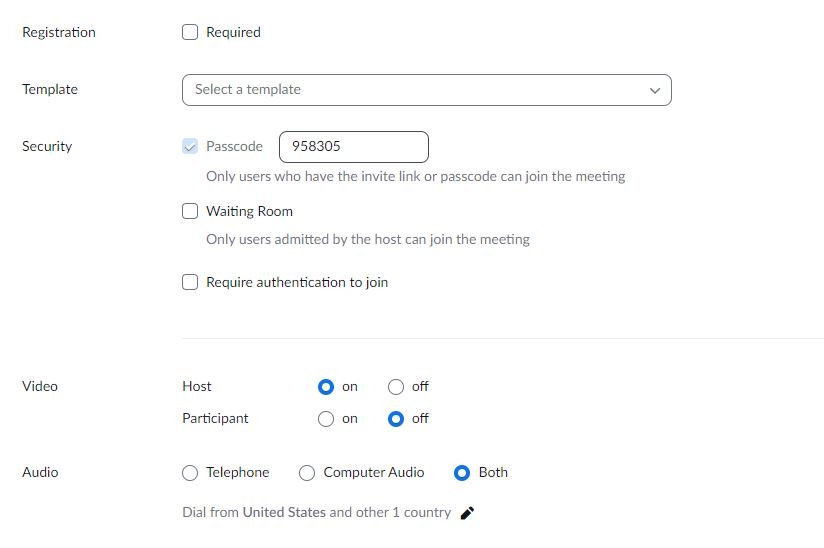
Click on the Save button to save the meeting.

Copy and paste the Meeting ID number onto a text document. You will need it for Step 3.
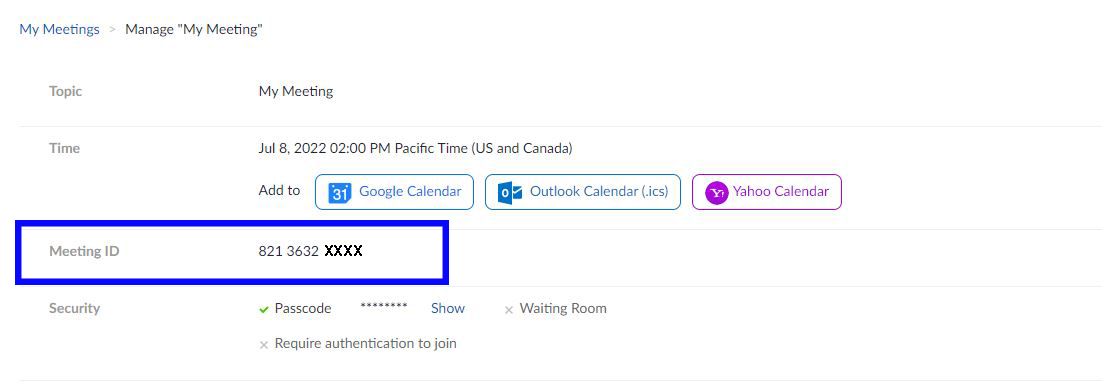
Important!: ensure that this meeting link is shared to students in your course as the Zoom lecture meeting link. You absolutely MUST NOT use your personal room Zoom link for the course lectures you want to share via Panopto.
Step 2: Locate the Name of Your Course’s Panopto Folder
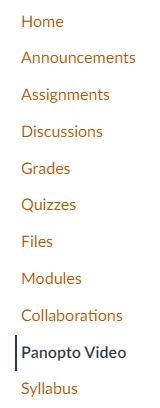
From your Canvas Course navigation, go to Panopto.
On the Panopto page, click on the Overview icon, which is shaped like a gear, located in the top right corner of the page.
A modal window will appear with information about your course’s Panopto folder. Copy and paste the Name of the Canvas folder onto a text document, or take a screenshot of the information.

Step 3: Map Your Course Zoom Meetings to Your Course’s Folder in Panopto
Next, sign into your Panopto Dashboard using this link: https://humboldt.hosted.panopto.com/.
Click on your username located in the top right hand corner of your Panopto Dashboard.
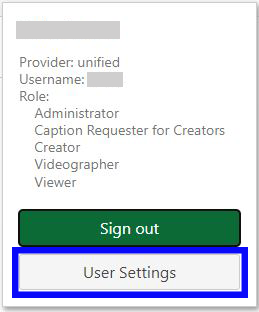
From the dropdown menu that appears, select User Settings.
On the User Settings pop-up window, scroll to Meeting Import Settings.
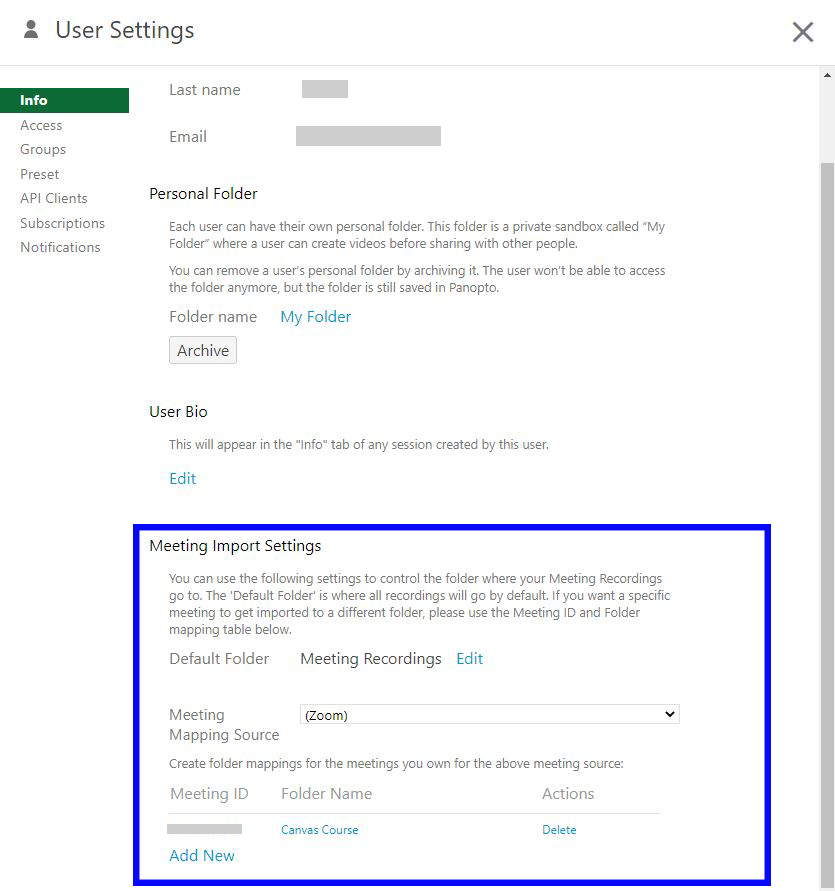
Under Meeting Map Source (which is set to Zoom), click on Add New to create a folder mapping for your course’s Zoom lectures.
Fill out the following information:
- Meeting ID: in the provided field, enter the Meeting ID you copied down in Step 1.
- Folder Name: select the dropdown menu and copy and paste the Name of your Canvas course folder into the search box. The dropdown menu should now only list your course. Select it.
Click on Save to save this mapping (or Cancel to exit without saving).
The Zoom meetings you conduct with the meeting you created in Step 1 will now automatically upload to your course’s Panopto folder.

Extra: Ensure Students are Emailed When Video Lectures are Available
From your Canvas Course navigation, go to Panopto.
On the Panopto page, click on the Overview icon, which looks like a gear, located in the top right corner of the page.
A modal window will appear with information about your course’s Panopto folder.
From the navigation sidebar, go to Settings. Select the checkbox next to Notify viewers via email and Microsoft Teams (if connected) when new videos are ready, in order to automatically email students when Zoom lectures are ready to view on Panopto.


