

Breadcrumb
25Live FAQs
Frequently Asked Questions
If 25Live is performing slower than usual or freezes, the best first step to solve the issues is to clear the cache of your browser.
If clearing the cache does not solve the issue, email 25Live@humboldt.edu to report the problems you are experiencing.
How to share a search with someone in 25Live?
Click on the Go to Search button in the upper right corner of 25Live Pro.
Next, using the drop-down menus at the top of the page first select the object of your search (e.g. Events, Locations, Resources, Organizations, Tasks), then the specific search you wish to share with somebody.
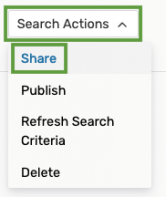
Once you find the right search, click on the Search Actions menu, then select the Share option from the drop-down menu.
When you click on Share, a pop-up window, in which you can search for 25Live contacts will appear. Enter a part of or the full first or last name of the person with whom you wish to share this search. Check the box to the left of their name, then click on the Done button in the bottom right corner of the pop-up.

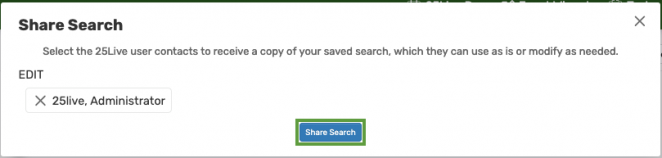
Lastly, click on the Share Search button on the Share Search pop-up window to complete the process. You and the person with whom you shared the search will receive an email confirming that you shared a search with them.
How to find and use a search someone else shared with me in 25Live?
Click on the Go to Search button in the upper right corner of 25Live Pro.
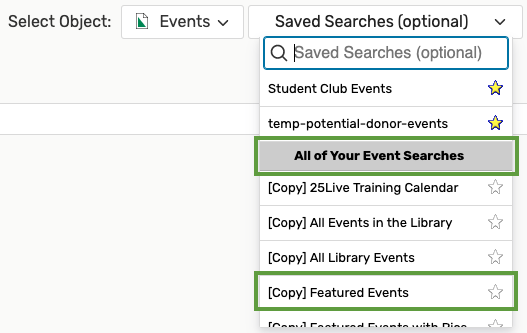
Using the drop-down menu select the object of your search (e.g. Events, Locations, Resources, Organizations, Tasks), then in the Saved Searches (Optional) drop-down menu scroll down to the All of Your Searches section and look for the newly shared with you search. Its name will begin with the word [Copy]. Click on the search so you can rename it to a more user-friendly name.
The search you selected will appear in the Quick Search area below. To rename it, click on the Save As button:

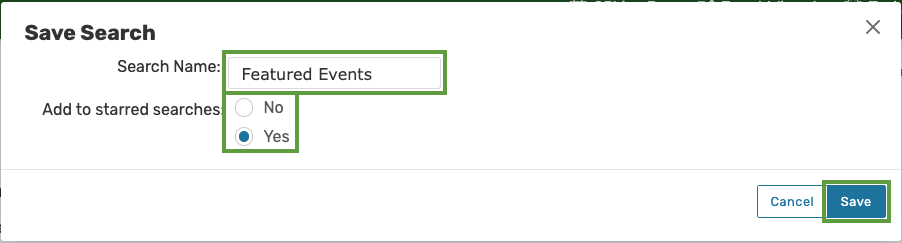
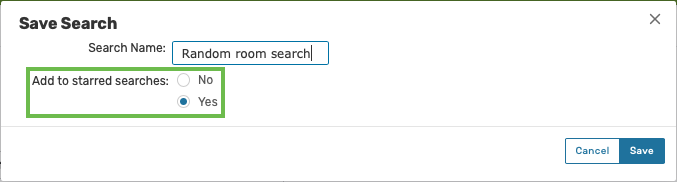
Once you click on the Save As button, a pop-up window appears. Change the name of your new search to a name that makes the most sense to you. If you anticipate that you will be using this search frequently, you can also select the Yes radio button in the Add to Your Starred Searches section to speed up access to this search (this search will now appear on your 25Live home page). Click on the Save button in the bottom right corner to save the changes you made.
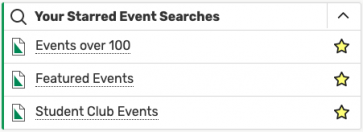
If you chose to add this search to your starred searches, you can quickly access it directly from your 25Live home page in the Your Starred Event Searches (or Your Starred Location Searches, or Your Starred Resources Searches, etc) widget.
25Live has easily to interpret indicators of whether or not you have the authorization to reserve a particular location.
Before you start a reservation
Any time you see a "paper and pencil" icon in the availability or calendar view, it's a sure sign that you can reserve that location (assuming that it is available). You can click directly on the "paper and pencil" icon to begin reserving the corresponding to it location.
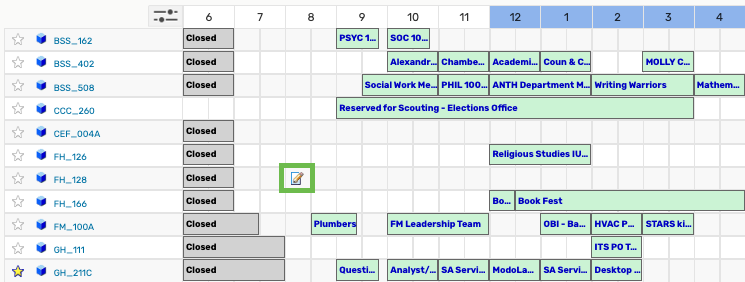
PRO TIP: using this method saves you the time you would otherwise spend on entering the day and time of the reservation, and searching for the location.
In the process of making a reservation
Once you start to enter your reservation in the 25Live Event Form, in the Event Locations section, you will see a variety of buttons indicating your ability to reserve various locations.
- Location Available - a blue "Request" button indicates that the location is available on the day(s) and at the time of interest to you AND you are authorized to reserve it.
- Location Not Available - a no-button "Unavailable" word indicates that this location is not available on the day(s) and at the time of interest to you (even though you are authorized to reserve it). You can click on the Conflict Details link to the right to see what the conflicting event is.

- Location Available on Some Days - the brown "Request Available" button indicates that the location is available on some of the day(s)/time(s) of interest to you AND you are authorized to reserve it. You can click on the Conflict Details link to the right to see what the conflicting event is.

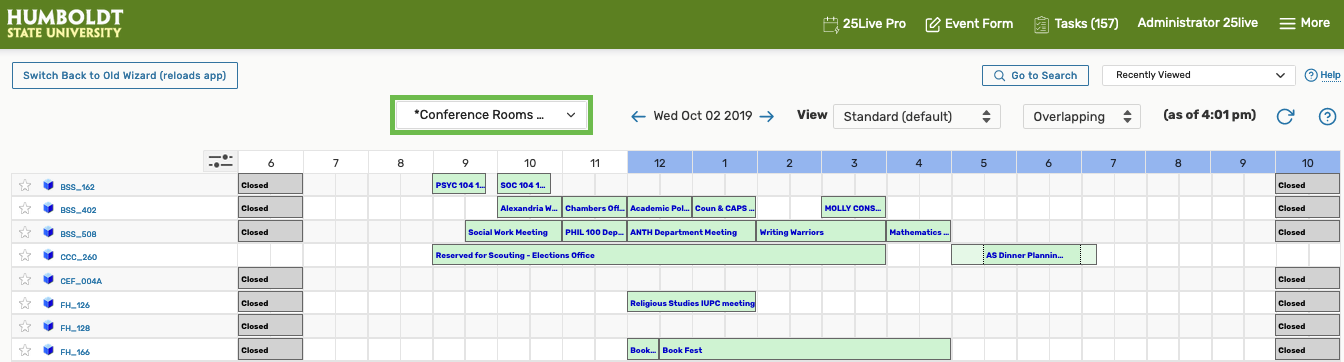
Yes, more and more campus rooms are scheduled via 25Live and you can use this software to request to book almost all conference rooms on campus.
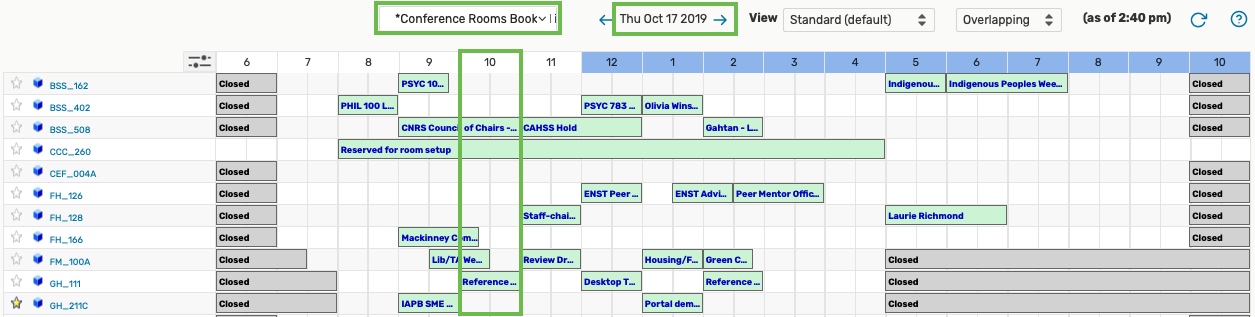
You can find conference rooms booked in 25Live, by clicking on the More button in the upper right corner, then selecting the Availability link. Next, select the "Conference Rooms Booked in 25Live" search.
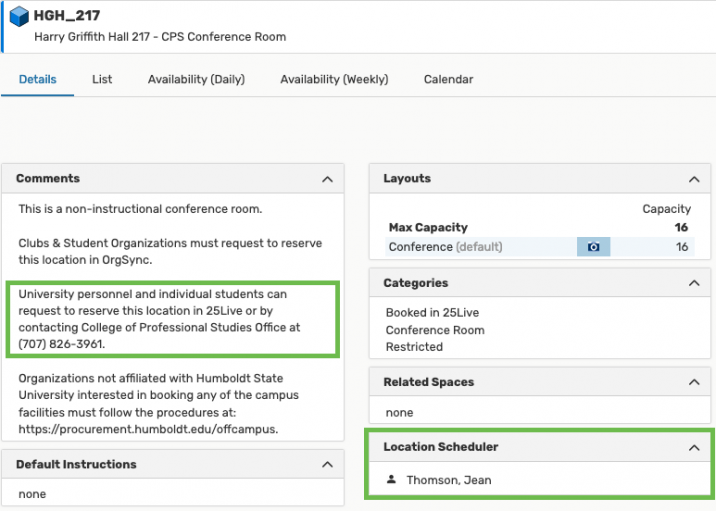
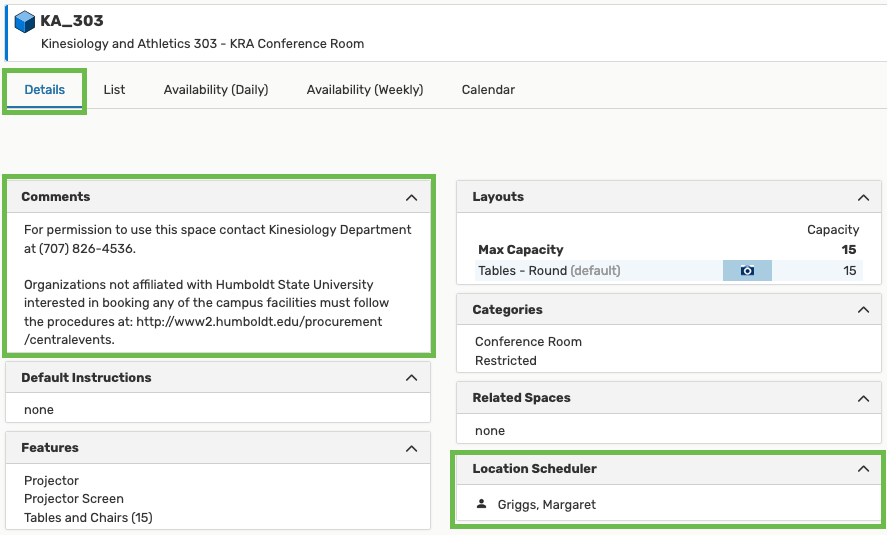
If you are looking to book a conference room not currently scheduled in 25Live, you can find who the person/office who manages the room is by clicking on the location’s name, then navigating to the Details view and reviewing the Comments, Organization, and Location Scheduler information. Next, contact the office listed in the Comments and its staff will assist you with your request.
Rooms for full-semester classes cannot be reserved in 25Live directly. If you're looking to schedule a class in a particular space, please contact your department coordinator who will verify class details and email r25class@humboldt.edu.
One-time class meetings can be reserved by students, staff, or faculty directly in 25Live.
Below you will find ideas on how to fix certain Save Errors when scheduling in 25Live:
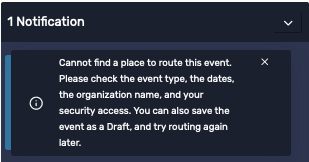
- "Cannot find a place to route this event" - this error often occurs when events are scheduled across calendar years, for example, August 1, 2018-May 31, 2019. Events MUST be contained within 1 calendar year (for example 2018) not span multiple years (2018-2019). The way to prevent this error is to create 2 events - one for 2018, then copy it and create another one for 2019.
How to confirm that you got the room you requested?
Search for your event using the Quick Search functionality:

- When your event appears in the List search results, look for the location you requested in the Locations column. If the location you requested appears in this column, it has been assigned to your event. You "got the room".

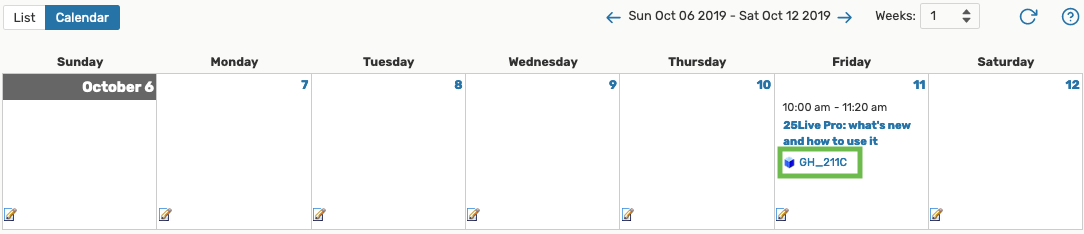
- When your event appears in the Calendar search results, look for the location you requested below the name of your event. If the location you requested appears directly below your event, it has been assigned to your event.
- If you open your event, select the Occurrences view and review the Event Occurrences section. If the location you requested appears in the Additional Details column, it has been assigned to your event.

How to tell if your room request is still pending?
Open your event, select the Occurrences view and review the Additional Details column information. If the room has not been assigned yet, you will see a comment that states that your room "is awaiting approval".

How to make sure that you actually requested a room?
Open your event, select the Occurrences view and review the Additional Details column information. If there is no room information in this column, you most likely did not select any location when you created your event. It is also possible that you requested a room, but your request was denied. In either case, there will be no location information in the Additional Details column.

To select a location for your event, click on the Edit this Event link just above the list of occurrences, and request the location of interest to you.
You can access 25Live directly on the web at https://25live.collegenet.com/pro/humboldt or via myHumboldt portal.
You can also use the green "Access to 25Live" button in the upper right corner of this website after you click on the Return to all FAQs link at the bottom of this page.
NOTE: 25Live requires you to log in using your Humboldt user name and password. Only Humboldt students, faculty, staff, and administrators can access 25Live, check room availability, and submit reservation requests.
PRE-REQUISITES:
- 25Live administrator creates a 25Live calendar that meets the department's needs and provides calendar web name (you will need it in step 2).
- MarCom enables the Trumba module on the department's website.
1. Create the main calendar page. If you are new to Drupal, follow the OpenHSU user guide on how to add a new page.
We recommend that you use the word "calendar" in the permalink, e.g. https://cnrs.humboldt.edu/events-calendar. Copy and save this new URL (you will need it in step 2).

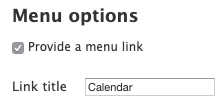
We also recommend that while creating this main calendar page, you add it to your website's menu, by checking the "Provide a menu link" box in the Menu Options:
2. Once you created the main calendar page, select the Customize this page button at the bottom of the page.
In the Content column, add content using the plus (+) icon in the right corner of the blue header

Adding calendar view tabs:
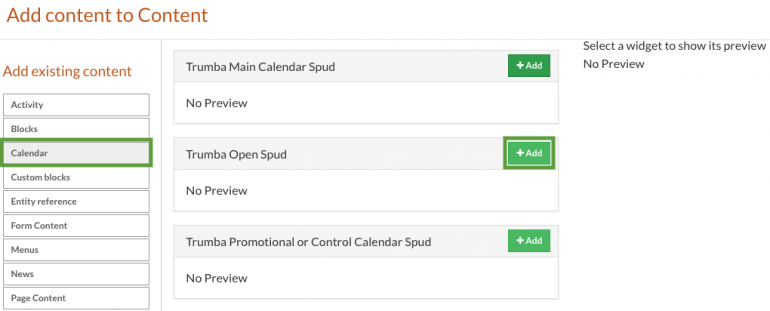
From the left side content options, select Calendar. Then in the available Trumba calendar options, locate the Trumba Open Spud section and select the Add button next to it.
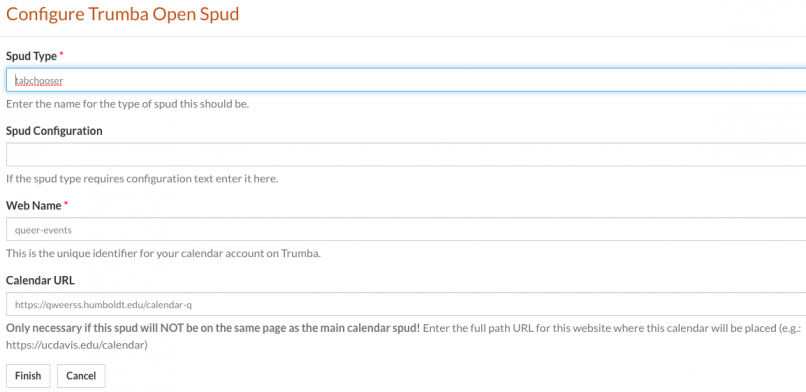
In the Spud Type field type in "tabchooser". In the Web Name field enter the web name provided to you by the 25Live administrator. In the Calendar URL field paste the link to the page on which the main calendar will be located. Click on the Finish button to save the new spud.
Your calendar will now have different views available at the top of it. These views are set up by the 25Live administrator upon your request.

Adding the main calendar:
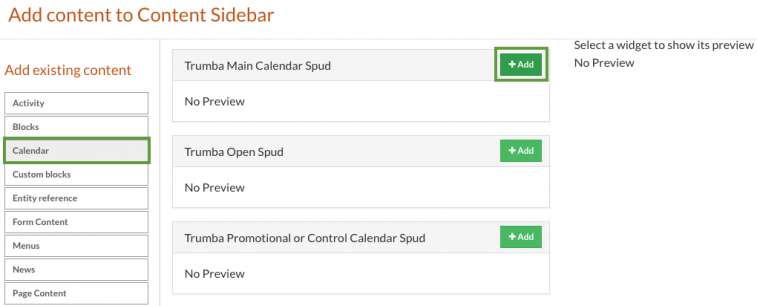
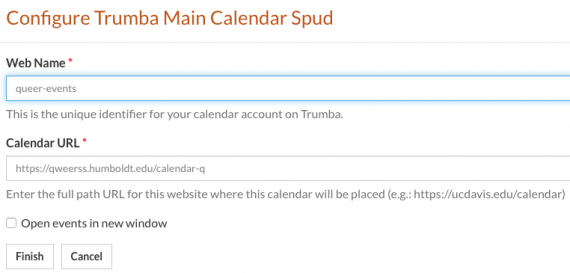
From the left side content options, select Calendar. Then in the available Trumba calendar options, locate the Trumba Main Calendar Spud section and select the Add button next to it.
In the Web Name field enter the web name provided to you by the 25Live administrator. In the Calendar URL field paste the link to the page on which the main calendar will be located. Click on the Finish button to save the new spud.
Adding other calendar and calendar-related spuds:
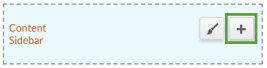
In the Content Sidebar section, add content using the plus (+) icon in the right corner of the blue header:
From the left side content options, select Calendar. Then in the available Trumba calendar options, locate the either Trumba Open Spud or Trumba Promotional or Control Calendar Spud section and select the Add button next to it.
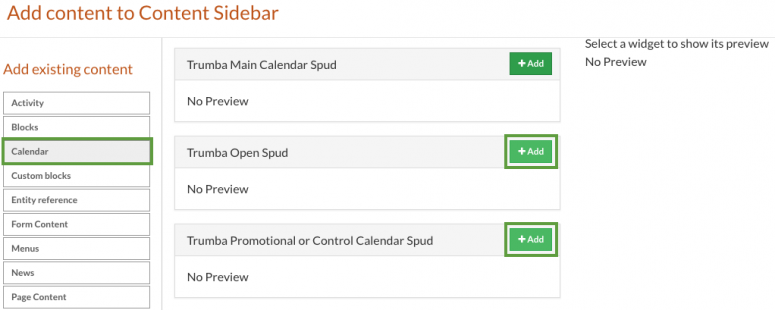
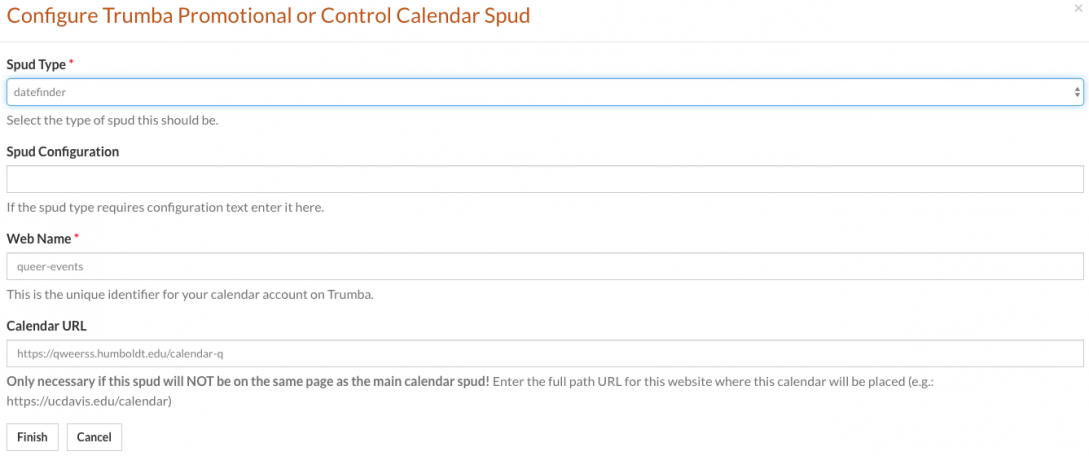
The Trumba Promotional or Control Calendar Spud offers the following pre-designed spud types:
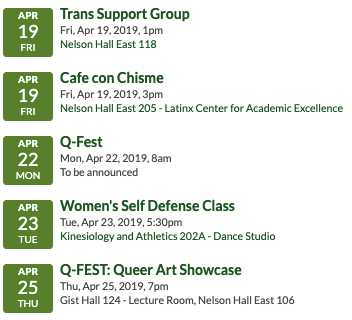
"upcoming":
"datefinder":
"daysummary":

"filter":
Select the desired Spud Type from the drop-down menu. You may leave the Spud Configuration field blank. In the Web Name field enter the web name provided to you by the 25Live administrator. In the Calendar URL field paste the link to the page on which the main calendar will be located. Click on the Finish button to save the new spud.
If you selected Trumba Open Spud you may manually enter the type of spud you add to your website. The 25Live administrator will provide you with the right spud name. Some of the options include but are not limited to:
"searchlabeled":

"monthlist":
"upcomingfader":
This spud looks just like the "upcoming" spud but it offers a dynamic fading in and out effect.
"upcomingcrawler":
This spud looks just like the "upcoming" spud but it offers a dynamic upwards scrolling of events.
"upcomingslider":
This spud offers a vertical slider of a custom number of events:
Once you have added all the desired calendar components, make sure to click on the Save button at the bottom of the page to save all of the changes.
For more instructions on how to work with the content panes click here.
When you receive an email confirmation of your room reservation, you can easily add it to your Google Calendar and invite other guests to it by using one of the methods below. Each of these methods will take you to a Google Calendar page where you can create an event with the details imported from 25Live and add it to your calendar:
The event recognition feature does not work for some users who have English(UK) set as the language. Change your language settings to English (US):
Image
Click on the date and time link in the Summary section of the email, then click on the "Add to Calendar" pop-up box:
Image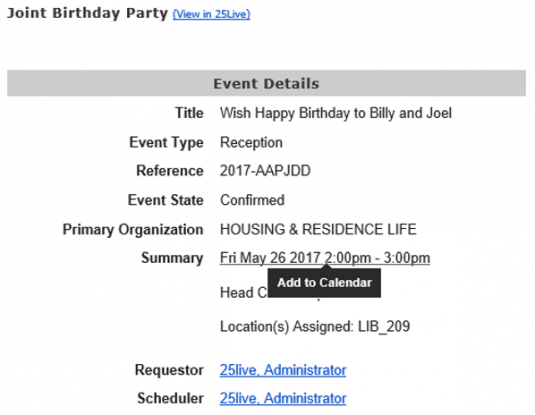
- Click on the Arrow Down in the upper right corner of the room reservation confirmation email and from the drop-down menu select the "Create event" option:
Click on the More button above the room reservation confirmation email and from the drop-down menu select the "Create event" option:
Image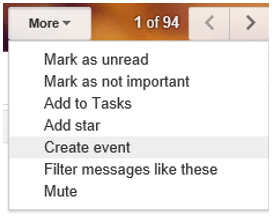
If everything else fails, open the email in a full-screen mode using the icon in the upper right corner and try step 4:
Image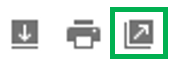
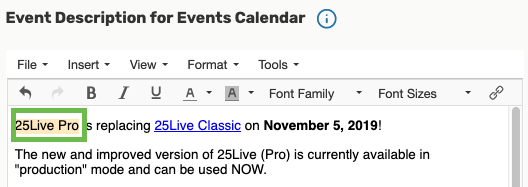
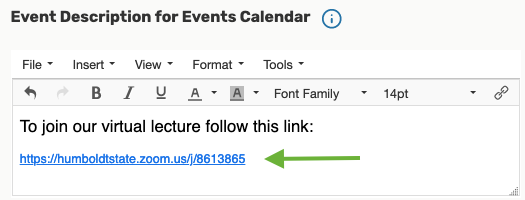
To add a link in the description of your event, navigate to the Event Description for Events Calendar field of the Event Form, and highlight the text you want to turn into a link:
Next, click on the Insert drop-down menu at the top of the Event Description box, then, select the Insert Link option.

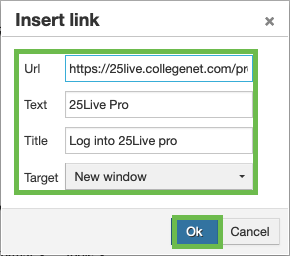
In the fields of the pop-up window, enter the following information :
- Url: paste the link;
- Text: this should be the text you highlighted and want to turn into a link;
- Title: enter the text you would like to display when someone places their mouse's cursor over the link, e.g. name of the website to which the link will take them;
- Target: select New window from the drop-down menu in order for the link to open in a new browser window/tab.
- Select the OK button to continue.
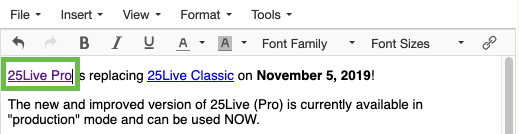
Once you complete the steps above, you will notice that the text you wanted to turn into a link is now underlined and in blue font - you created a proper active link.
Select the Save button at the bottom of the page in order to save the changes you just made to your reservation.
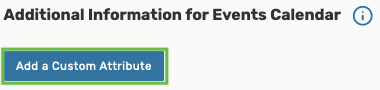
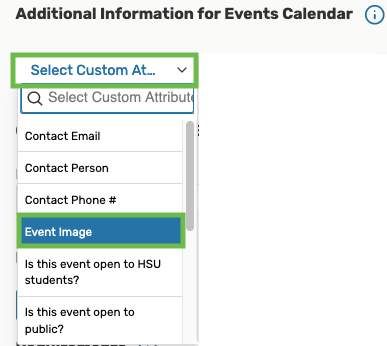
To add a picture to the description of your event, scroll down in the Event Form until you see the Additional Information for Events Calendar section. Next, click on the Add a Custom Attribute button.
Next, click on the Select Custom Attribute button, and from the drop-down menu below it, select the Event Image option.
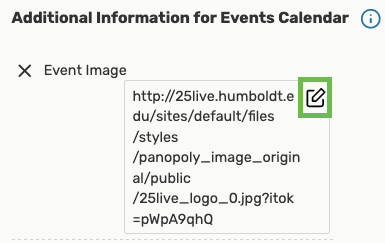
When the Event Image field appears in the Event Form, click on the "paper and pencil" icon to the right of the field, then paste the link to the image. Make sure that the link to your image starts with "http:" (NOT "https:").
NOTE: You CANNOT upload pictures into 25Live. You have to use a link to an image already posted on the web. Follow the instructions below if you don't have your image posted on the web yet.
If you have your own image you would like to add to the event, you must first post it to a website, then copy its location. You can use imgur.com to upload your image. Click on the New post button in the upper left corner of the page and upload your image.

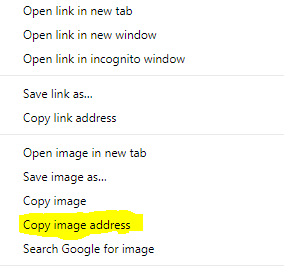
Once the image is uploaded,
- if you are using Google Chrome, right-click on it and select the Copy image address option, then paste the copied link into the Event Image field of your 25Live Event Wizard.
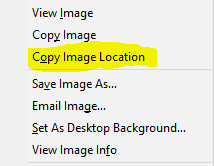
- if you are using Mozilla Firefox, right-click on it and select the Copy image address option, then paste the copied link into the Event Image field of your 25Live Event Wizard.
You can also look for images on the websites with free images suggested here.
Once your photo has been added to the event AND your event has been published to a web calendar, the photo will appear next to your event in the list of events as well as in the event description when viewing event details.

When creating an online/virtual event, follow the usual steps for adding an event in 25Live, but pay special attention to the following 3 areas:
1. Make sure that you take advantage of the Event Description for Events Calendar field to add all information pertinent to your event, particularly a link to how to access your virtual event.
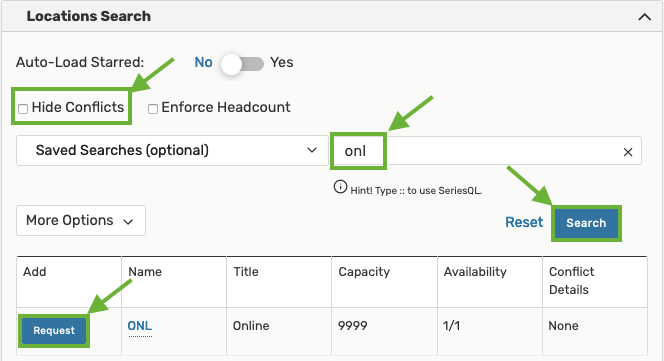
2. Make sure to select ONL as the location for your event
When you search for the "ONL" location, make sure to uncheck the Hide Conflicts checkbox. If the location is available, you will see the blue Request button. Click on it.
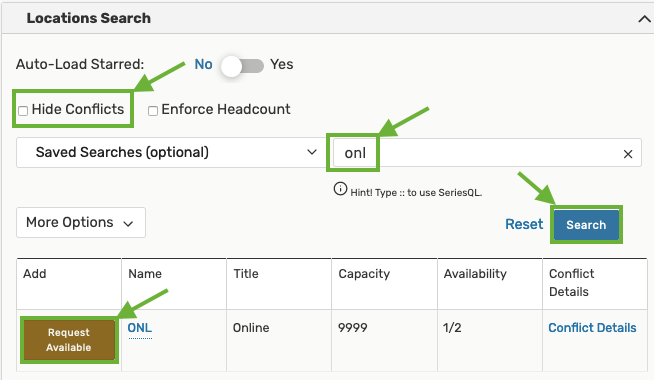
If the location is not available, you will see the brown Request Available button. Click on it. (The ONL location can be shared between an indefinite number of events.)
3. Lastly, make sure that you select at least one of the Campus Events Calendars on which you would like to post your event.
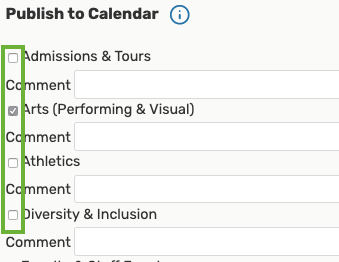
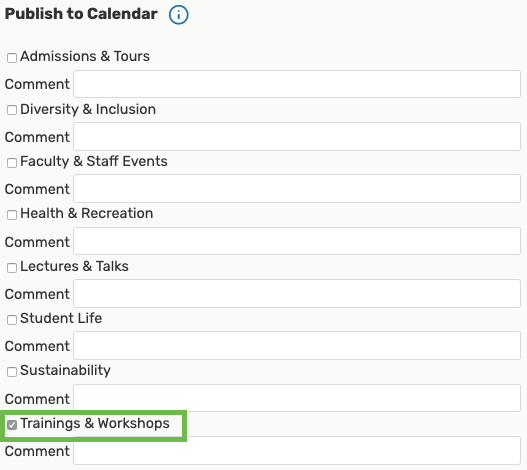
As you scroll down the Event Form fields entering your event/room reservation details into 25Live, you will come across a section titled "Publish to Calendar".
This section allows you to select to which sub-calendar of the main Campus Events Calendar your event will be published. The options listed in this section correspond with Humboldt's main campus calendar sub-calendars.
NOTE that the web calendars powered by 25Live (such as the Campus Events Calendar or your departmental calendar) update twice every hour. If you are not seeing your event on the web calendar immediately, give it up to 30 minutes and check again.
AVOID selecting multiple calendars unless absolutely necessary (follow the "less is more" principle) and/or adding Comments for any of the calendars (they do not get published on the events calendars).
If you do not select any of the checkboxes, your reservation will remain in 25Live holding the room you requested, but it will not be published on the main Campus Events Calendar. That is OK for many reservations.
If you are making the reservation for yourself:
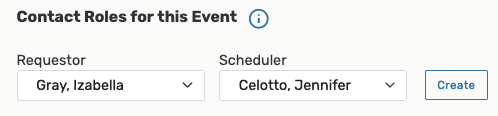
If you are making the reservation for yourself, your name will be automatically added to the reservation in the Contact Roles for this Event section of the Event Form:

If you are making the reservation for somebody else:
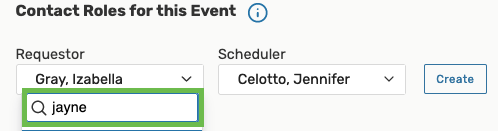
If you are making a reservation for a student, faculty member, or administrator, enter their name in the Requestor field and select the right person from the list below.

NOTE: Only Humboldt users who have at least once logged into 25Live exist as contacts in 25Live.
If you are unable to find the person who is requesting this reservation, the Events Comments field is a good place to enter the requestor's name and campus phone number or email. Do not enter personal cell phone numbers in this field.
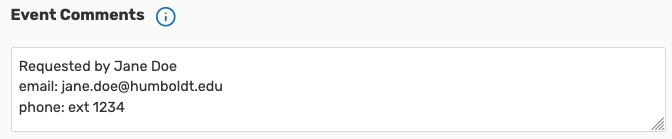
If you must, enter people's cell phone numbers only in the Internal Notes field if it is available to you.
Creating a Location Search in 25Live allows users not only to quickly review the availability and features of a subset of rooms, but it also enables them to run a variety of reports for these locations.
In order to create your own custom Location Search, click on the Go to Search button in the upper right corner of 25Live:
Next, from the Select Object drop-down menu at the top of the page select Locations. Then, flip the toggle switch from Quick Search to Advanced. Lastly, click on the Add Criteria button to begin creating your own search.

Read below for some ideas on searches that may come in handy.
Locations managed by a specific organization
From the Add Criteria list, select Custom Attribute
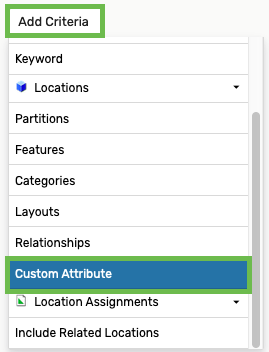
Next click on the Custom Attribute empty drop-down menu to select the attribute:
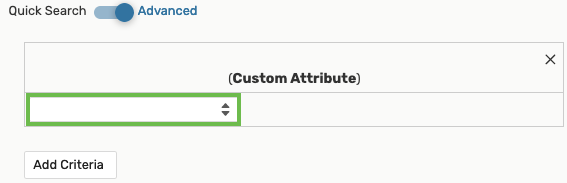
Once the drop-down menu appears, select the Organization custom attribute. Once you do, the word Organization will appear at the top of the criteria:
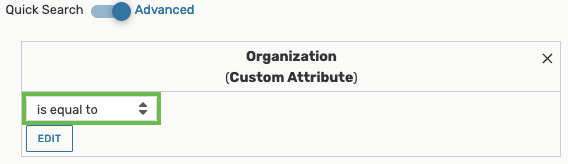
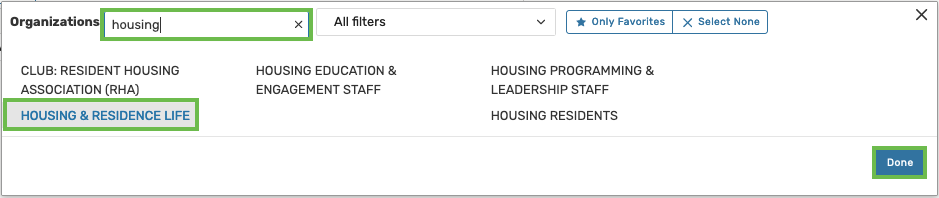
Now you can select for which organization's rooms you wish to create the search. Click on the "is equal to" drop-down menu. Once you do, an organization search window will pop up. Type in part of the name of the organization of interest to you, then click on it in the list of search results below. Lastly, click on the Done button.
Next, select the Save As button in the bottom right corner.
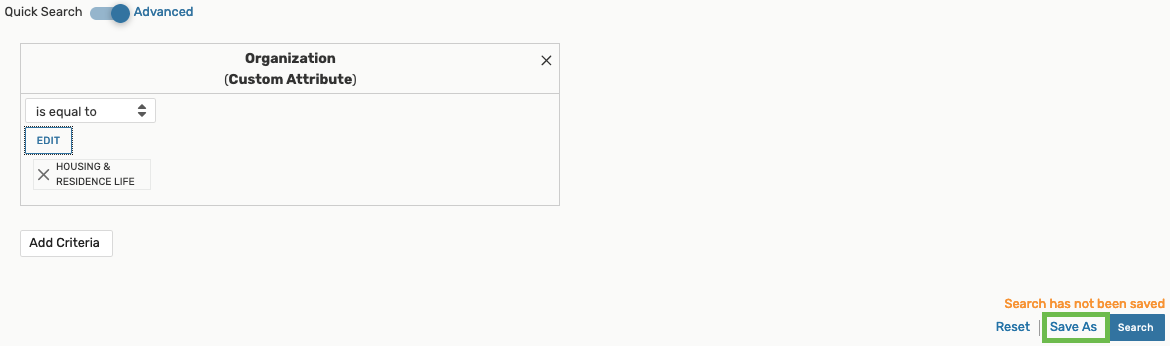
Give your search an informative name, for example: "Housing Rooms". Then decide if you want to add this search to your starred searches for speedier future access. Lastly, click on the Save button in the bottom right corner.

Now your search is ready to use. Learn how to use this search to create a search for all events in these locations.
A group of specific locations
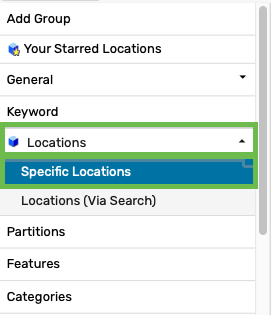
From the drop-down menu select Locations, then Specific Locations:
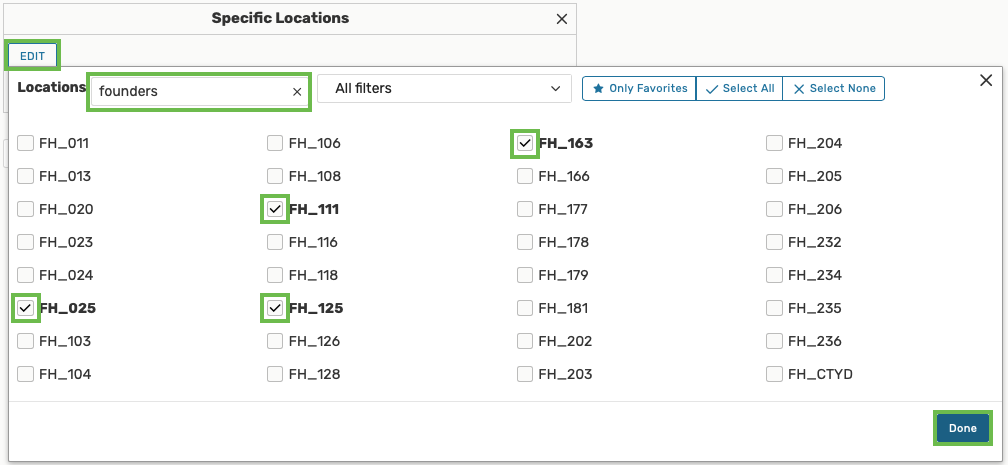
Next, click on the Edit button. In the Locations search field enter for example part of the name of the building you are interested in. Once this building's rooms appear, check the boxes to the left of any rooms of interest to you. You can perform this search for multiple buildings. Once you checked all the spaces of interest to you, click on the Done button in the bottom right corner.
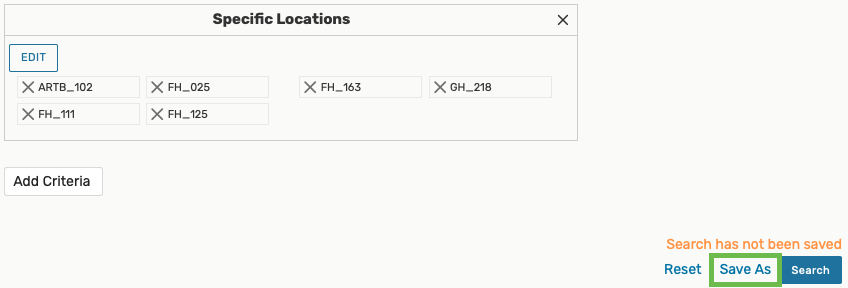
You can then add more search criteria by clicking on the Add Criteria button or save the search by clicking on the Save As button.
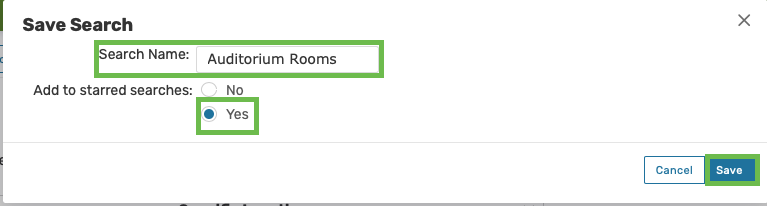
Give your search an informative name, for example: "Auditorium Rooms". Then decide if you want to add this search to your starred searches for speedier future access. Lastly, click on the Save button in the bottom right corner.
Your location search is now ready to be used!
Creating an Event Search in 25Live allows users not only to quickly review the calendars of a subset of events, but it also enables them to run a variety of reports for these events.
In order to create your own custom Event Search, click on the Go to Search button in the upper right corner of 25Live:
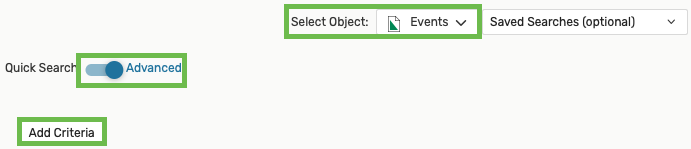
Next, from the Select Object drop-down menu at the top of the page select Events. Then, flip the toggle switch from Quick Search to Advanced. Lastly, click on the Add Criteria button to begin creating your own search.
Read below for some ideas on searches that may come in handy:
Events scheduled in a specific organization's rooms
(In order to build this search you will have to have created a Location Search for locations managed by the specific organization of interest to you. Here is how to do it.)
From the Add Criteria drop-down menu, select Assigned Locations, then Locations (via Search):
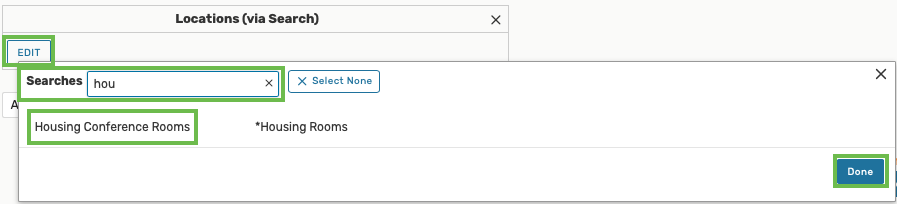
Next, click on the Edit button. In the Searches search field enter part of the name of the search in which you are interested. Once location searches matching your search criteria appear, click on the name of the location search you want to use. Then, click on the Done button in the bottom right corner

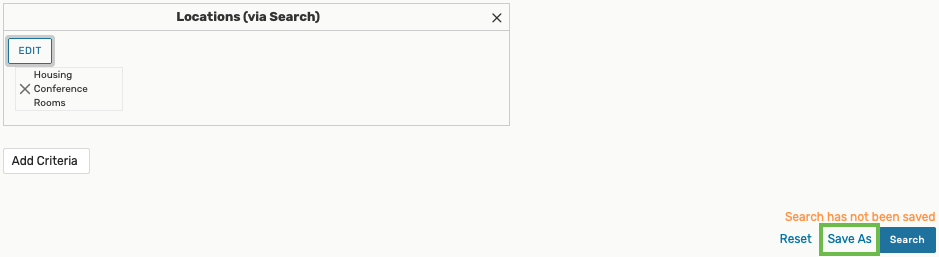
You can then add more search criteria by clicking on the Add Criteria button or save the search by clicking on the Save As button.
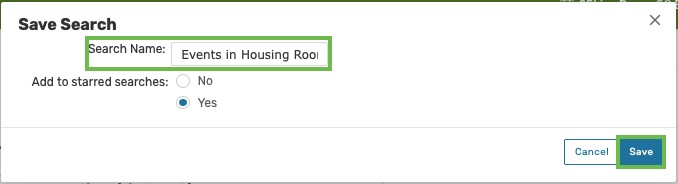
Give your search an informative name, for example: "Events in Housing & Res Life Locations". Then decide if you want to add this search to your starred searches for speedier future access. Lastly, click on the Save button in the bottom right corner.
Events within a specific date range
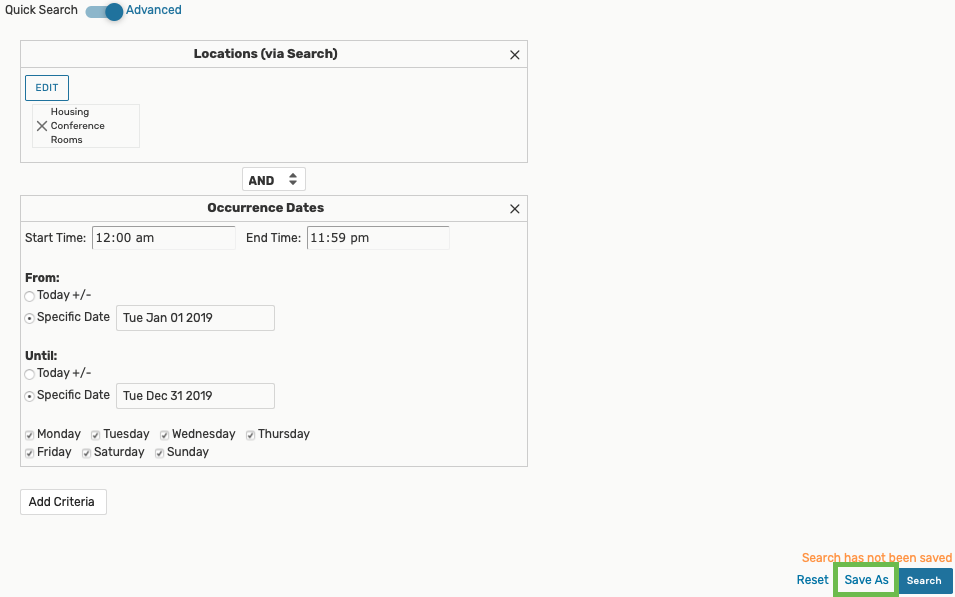
We will continue to refine the above search by limiting the dates of the events. Click on the Add Criteria button and select the Occurrence Dates option.
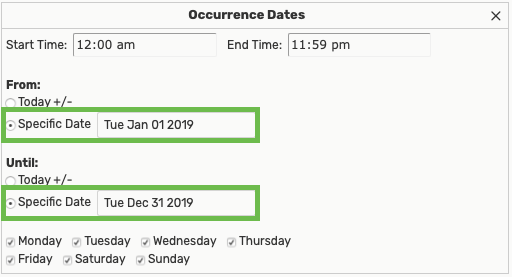
Next, in the From section select the Specific Date radio button and enter the earliest event date of interest to you. Similarly, in the Until section select the Specific Date radio button and enter the latest event date of interest to you.

Once the limiting date fields have been added to your search criteria, you can add more search criteria by clicking on the Add Criteria button or save the search by clicking on the Save (if you want to modify the existing search) or Save As (if you want to create a new search) button.
You are now ready to run reports.
To cancel ALL event occurrences (regardless if the event consists of only one day or if it repeats multiple times) navigate to event Details view (or Occurrences, or Task List views). The current event state is likely Confirmed or Tentative.
To proceed, from the event state drop-down menu select the Cancelled option.
Before the event is cancelled, you will see a warning pop-up message. If you wish to cancel the event, select the OK button.

The event state will change to Cancelled, which will release the room but will not remove the event from 25Live entirely.
Method 1
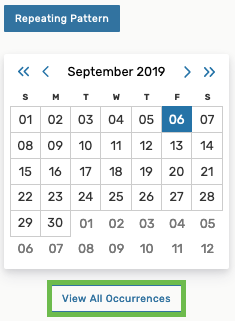
If your event has multiple occurrences, but you wish to cancel only one or some of them, open your event in the Event Form (by clicking on the Edit this Event link)
and scroll down to the Event Date and Time section and click on the View All Occurrences button.
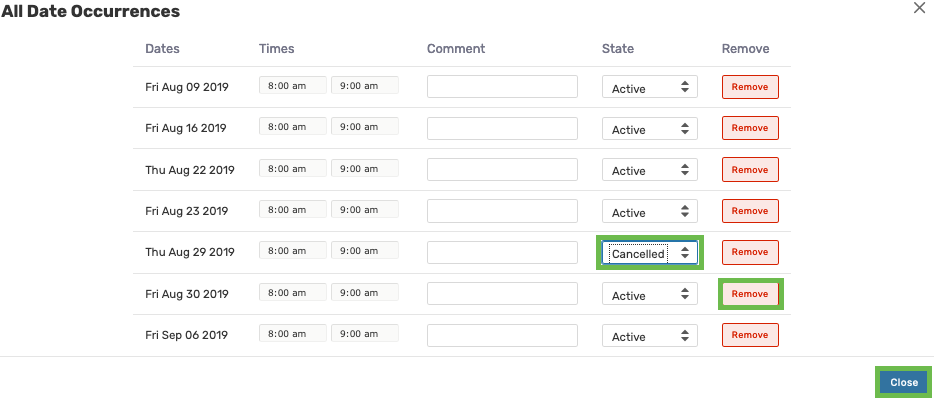
You will see a pop-up window with all dates of your reservation.
- If you wish to cancel a date for an event that was saved previously, you can use the State drop-down menu and change that date's status from Active to Cancelled, as shown for the Aug 29, 2019 date below.
- If you wish to cancel a date for an event that is being entered into 25Live for the first time, your reservation may be "cleaner" if you use the Remove button, as shown for the Aug 30, 2019 date below.
Once you removed/cancelled all desired dates, click on the Close button in the bottom right corner of the pop-up window.
Whichever cancellation method you select, make sure to save the whole event by clicking on the Save button in the bottom right corner of the page.
Method 2
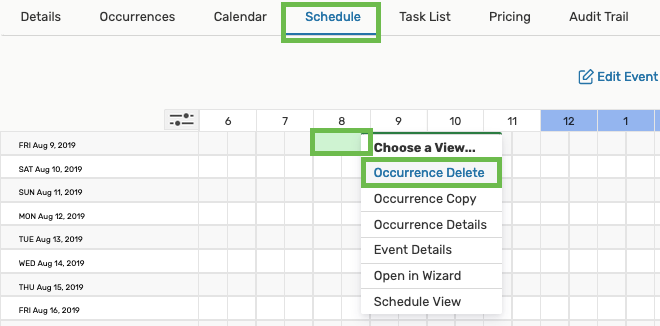
Navigate to the Schedule view of the event, then locate the event occurrence you wish to cancel/delete and right-click on it. From the pop-up menu, select the Occurrence Delete option:
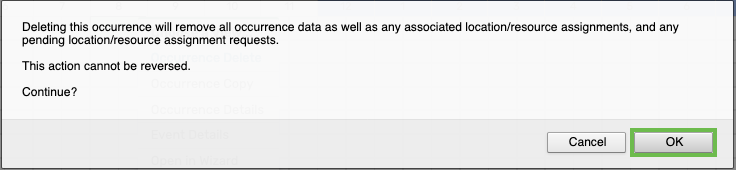
You will see a deletion warning message. If you wish to proceed, click on the OK button. Otherwise, click on the Cancel button.
You will notice that the cancelled date will disappear from your event's Schedule view.
To customize your 25Live Dashboard, you can:
1. Rearrange the elements on your Dashboard. Place your mouse over the header of an element until the mouse pointer turns into a 4-way arrow (not visible in the picture below). Then click on the header of an element and drag it to any other location on your Dashboard. Places available to drop this element will be highlighted in green. Release the mouse button to drop the element in the desired location.
2. Hide unused elements from your Dashboard. Click on the Customize Dashboard link in the bottom right corner of the window. The grey area at the top of the Dashboard into which you can drag unused items will appear. Place your mouse over the header of an element until the mouse pointer turns into a 4-way arrow (not visible in the picture below). Then click on the header of an element and drag it to the grey area to remove it from your daily view. Places available to drop this element will be highlighted in green. Release the mouse button to drop the element in the desired location.

3. Close unused elements. Select the up arrow button in the upper right corner of an element that you no longer wish to see (but do not want to hide it entirely as shown in the previous bullet).
4. Open previously closed elements. If you wish to see the contents of a previously closed element, just click on the plus icon on the right side of the element.
5. "Star" items to quickly access them directly from your Dashboard. "Starring" in 25Live works just making favorites in other applications. Click on the white star next to an item you want to make your favorite. Once the star color is changed to yellow, the newly "starred" item will appear on your Dashboard. To "un-starr" an item, simply click on the yellow star and turn it back to white. "Starring" and "Unstarring" can take place in a variety of places in 25Live. Below are some examples:
- "Star" Events:
- "Star" Event Searches when you save them
- "Star" Locations:
- "Star" Location Searches as you save them:
- "Star" Reports:

- Similarly, you can also "star" organizations, event types, contacts, and resources.
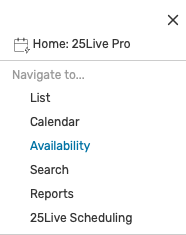
6. Find a room in the Availbility view. Peruse various types of rooms on a date of your choice in the Availability view. Click on the More button in the upper right corner of the 25Live window,
then select the Availability link:
Select a group of rooms of interest to you and adjust the date by clicking directly on it. Look for an available space in the columns corresponding with your event time.
PRO-TIP: You can also see details of each room by mousing over its name in the left hand column.
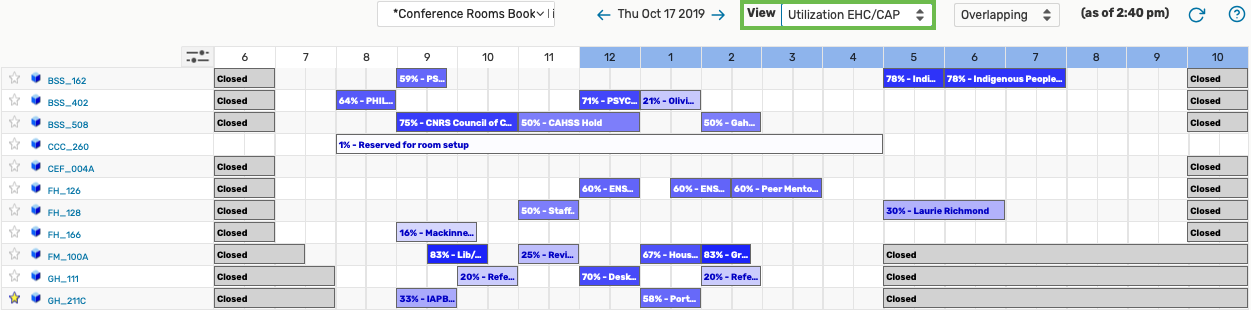
PRO-TIP: If you manage rooms of your own, you can also see how well they are utilized by selecting the Utilization EHC/CAP (Expected Head Count vs Room Capacity) option from the View drop-down menu. The events in the grid below will change colors from regular green to various shades of blue (or red) and include utilization %.
8. See the Calendar of upcoming events of your choice. Click on the More button in the upper right corner of the 25Live window,
then select the Calendar link:
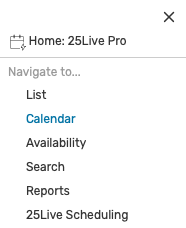
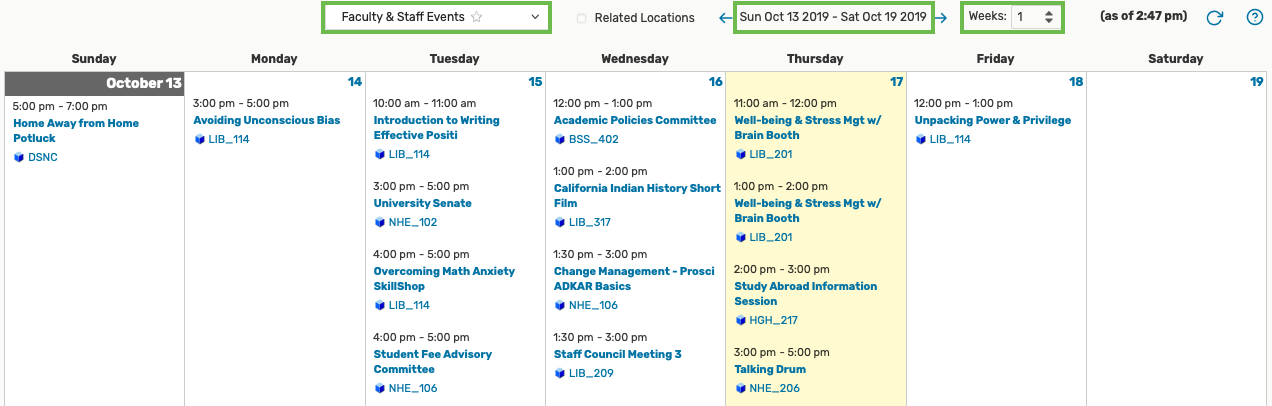
Select the group of rooms of interest to you, adjust the date range by clicking directly on it, and pick how many weeks you want to see at a time using the Weeks drop-down menu. The events shown in the calendar below should adjust every time you change your viewing parameters. For the latest updates, select the Refresh icon.
There are a few ways for you to email the details of an event, including confirmation of a room assignment, directly from 25Live to any email address.
1. You can email your event details any time while viewing event-specific details, calendar, or task list by selecting the More Actions menu in the upper right corner

then the Email Event Details option

2. You can also email your event details directly from your Tasks tab, from any event search results, or any calendar by right-clicking on the event name, then selecting the Email Event Details option from the pop-up menu:
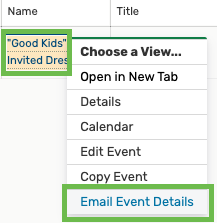
PRO-TIP: Notice that by right-clicking on the event name you can also quickly access functions like Editing or Copying the event.
When the Email Event Details window opens, check the "TO" box next to the requestor's name, or enter any email address in the "TO" field. If desired, add an automatically generated PDF attachment with reservation confirmation. Enter your message in the Message Body field, and make sure to check the Include event details in body of message checkbox at the bottom of the window, then click on the Send button.

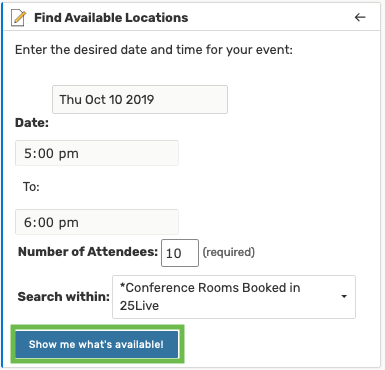
Use the Find Available Locations widget on the Home page of 25Live.
You may search for rooms available on a specific date and time or look for times and days available in a specific location. Just pick the option that better suits your needs. If you are looking for a classroom available to everyone on campus, select the *Unrestricted SMART Classrooms location search. If you are looking for a conference room, select the *Conference Rooms Booked in 25Live location search.
If you are looking to reserve a "restricted" room, you may need to request permission to use it from its "owner"; you can find this information by clicking on the location name, then the Details tab, and Comments or Location Scheduler section.
If you have not yet logged out:
1.
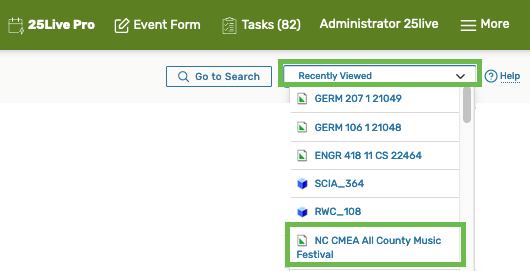
In the upper right corner of the page, locate the Recently Viewed drop-down menu. Click on it and scroll down until you find your reservation.
PRO-TIP: You can also use the Recently Viewed menu to find previously accessed locations, resources, and organizations.
If you logged out, follow the steps below:
2.
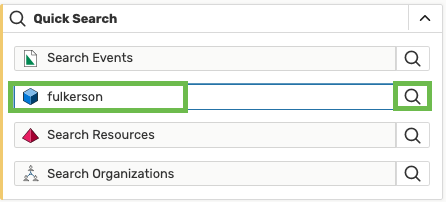
Use the Quick Search – Search Events section on your 25Live home page to locate your event by searching for any of the words used in its name or title.
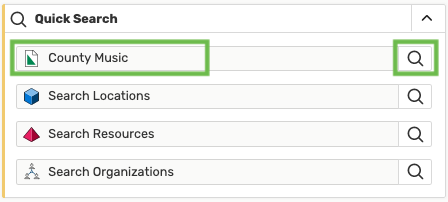
Find your event in the search results and click on the event Name to view its details.
PRO TIP: You can also right-click on the event name to quickly edit, copy, or email the event.

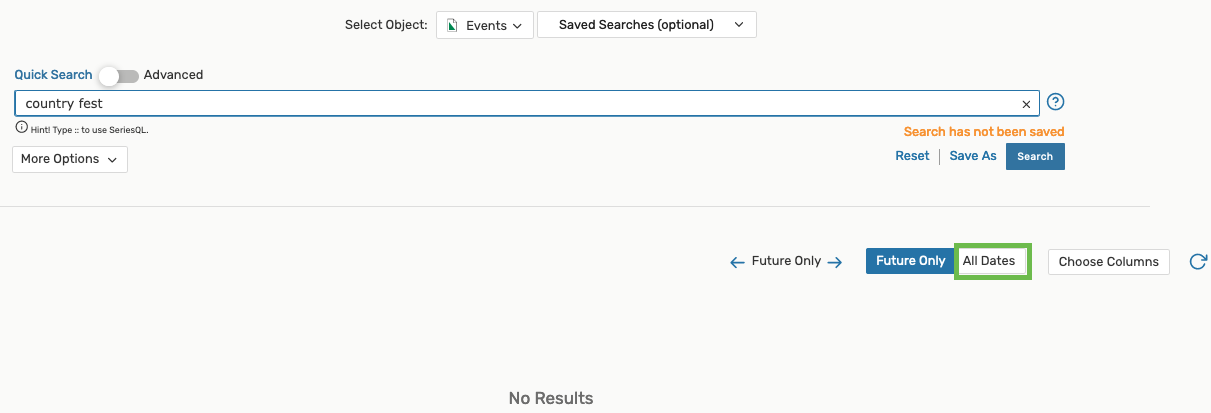
What to do if your event is not showing up in the search results at all?
Double-check the event name/title spelling. If that doesn't work, switch to All Dates view which will also show you past events:
If you are looking at your search results in a Calendar view, try adjusting the date range or the number of weeks you are viewing.

3.
Use the Quick Search – Search Locations section to find the room you requested, then navigate to the date you selected. If your room request was approved, your event should be on the room’s schedule.
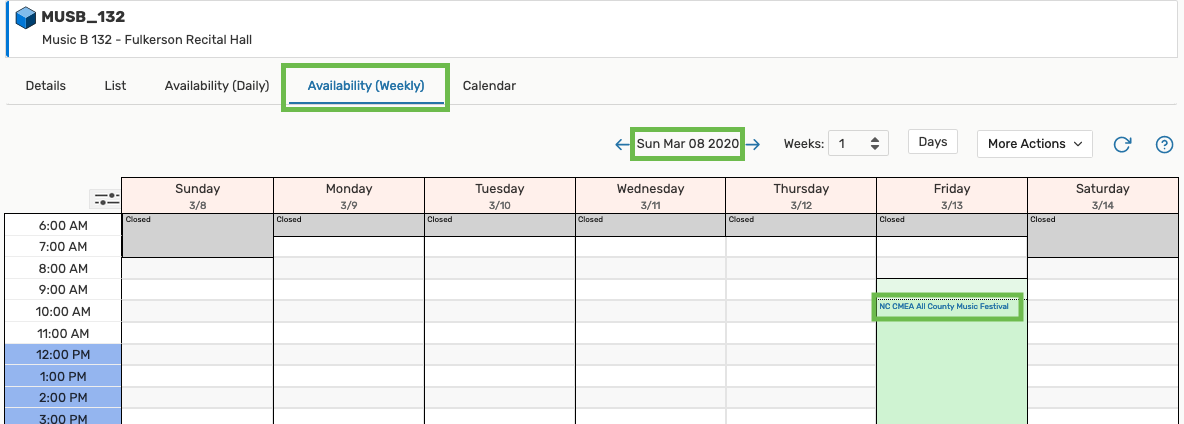
Click on the name of the location you have reserved in the search results:

Click on the Availability (Weekly) tab, then select the week during which the event you are looking for is taking place. Next, click on the name of your event to see more details:
4.
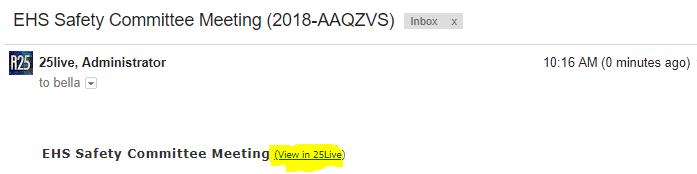
If you received a confirmation email – follow the link in your email to navigate to your event.
Learn all about the hidden and not-so-hidden features of the Campus Events Calendar calendar to master.
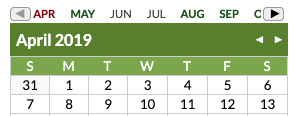
- Calendar view tabs are located on the top of the calendar/list of events and allow you to switch from a detailed or condensed list of events to a calendar-like view.
- Subscribe button is located in the upper right corner of a calendar or event list and it allows you to automatically import events in a given category directly to your Google calendar.
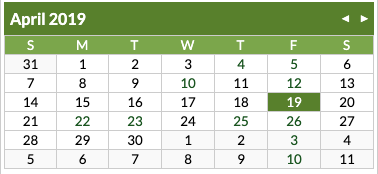
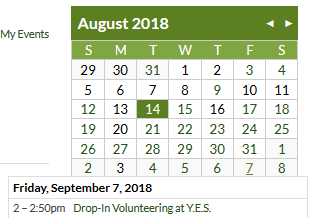
- Date picking tool is located at the top of the right-hand column and allows you to easily pick the date of interest to you. Notice that if you hover your mouse over the date that has events scheduled, the calendar displays a condensed list of events scheduled for that day.
- Search window is located below the date picking tool in the right-hand column. Use it to search for specific events in a given calendar category.
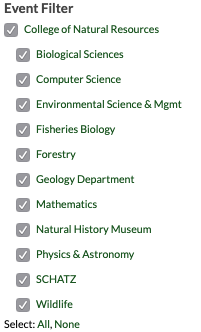
- Calendar categories are located Campus Events Calendar groups events by themes which can be accessed in the right-hand column of the calendar. Select the category of interest to you to see events that fall under it.
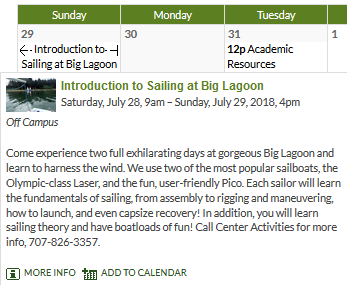
- Hovering your mouse over any event name opens up a frame with more details for that event. At the bottom of that frame, you can elect to see even "MORE INFO" or "ADD TO CALENDAR" - add the event directly to your own Google calendar.
- Event Details. When you are looking at the event details, you have the option to use a variety of interactive tools.
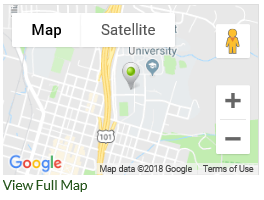
- You can see the map that shows you where the event venue is (currently only works in Internet Explorer) and a link to a full Google map so you can find the building if you are not very familiar with the campus
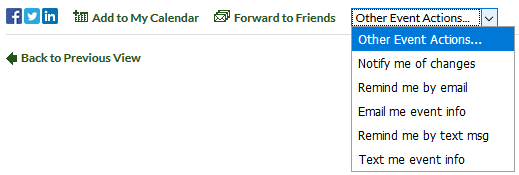
- You can share the event on Facebook, Twitter, LinkedIn, add it to your calendar, forward it to friends via email, or
- You can also select the Other Event Actions menu that gives you even more options for sharing the event and staying current on any changes to it.
Favorite / "Starred" Events
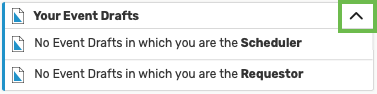
Making an event a "starred" event allows you to quickly access your event directly from your 25Live home page. Just look for the Your Starred Events pagelet:
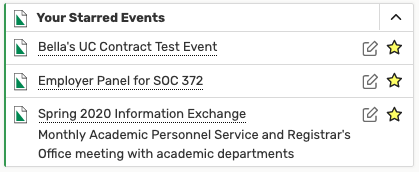
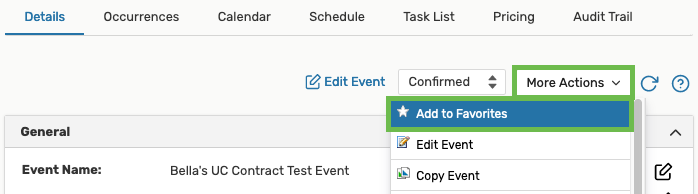
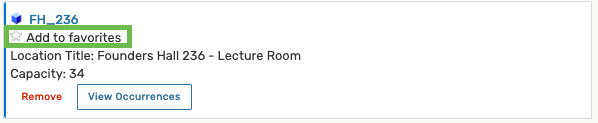
To star your event, select the Add to Favorites option from the More Actions menu:
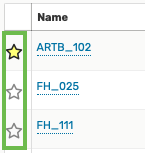
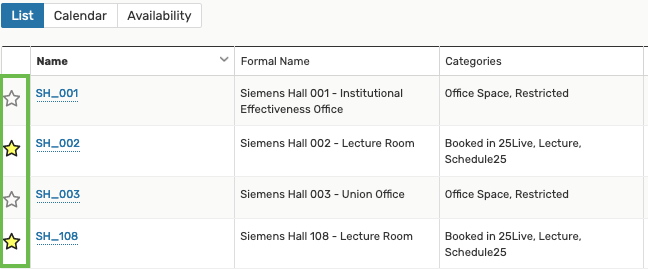
You can also star any event in your search results by clicking on the star icon to the left of the event name:

Favorite / "Starred" Locations
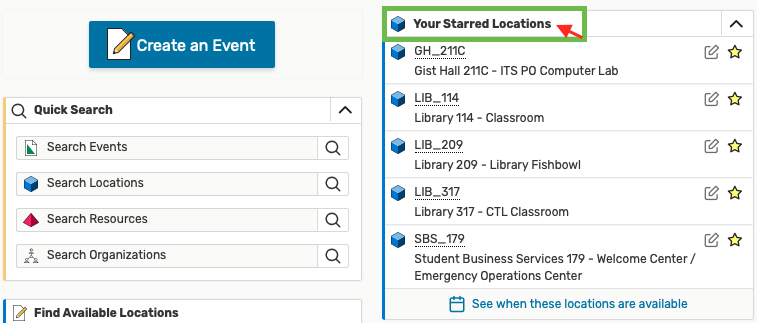
Making a location a "starred" location allows you to quickly access your location directly from your 25Live home page. Just look for the Your Starred Locations pagelet:
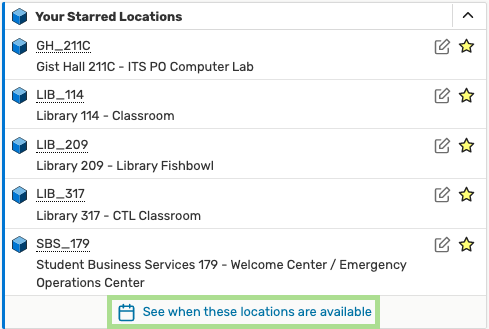
PRIO-TIP: Notice that making some locations your "starred", allows you to quickly schedule an event in them (by clicking on the edit icon) or to review their availability (by clicking on the See when these locations are available link at the bottom of the pagelet).
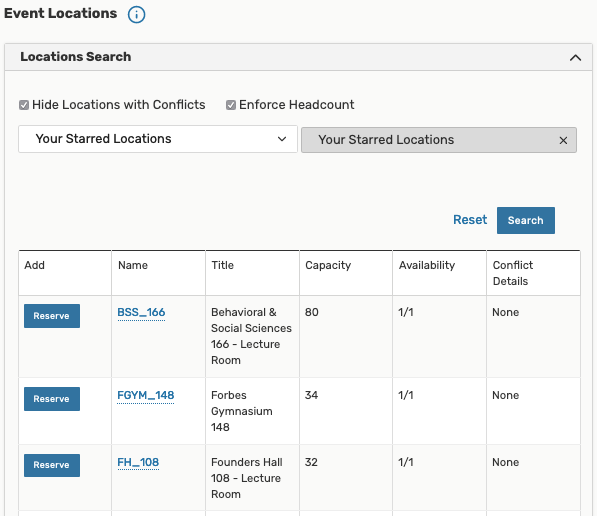
Making your favorite or most frequently used locations your "starred" locations also speeds up the process of selecting the room in the Event Form because 25Live first checks the availability of your starred locations:
To star a location, click on the white star icon next to the location name anytime you see it (the star will turn yellow):
- In the Event Form:
- In the list of locations:
Favorite / "Starred" Organizations
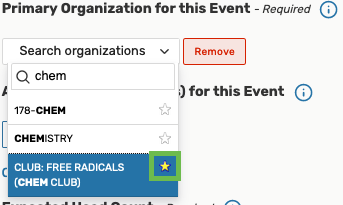
Making an organization a "starred" organization speeds up finding it in the Event Form:

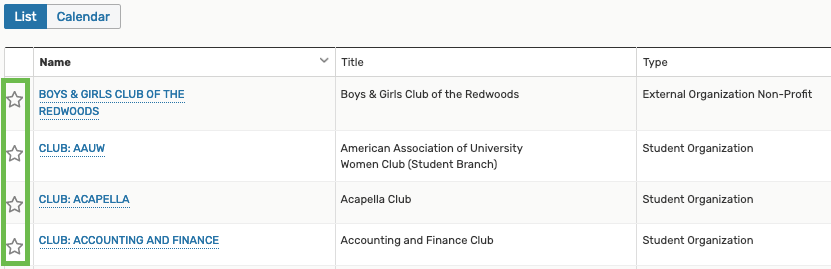
To star an organization, click on the white star icon next to the organization name anytime you see it (the star will turn yellow), for example:
1. In the Event Form
2. in the organization search results:
Favorite / "Starred" Event Types
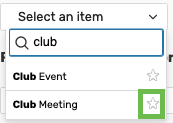
Making an event type a "starred" event type speeds up finding it in the Event Wizard:
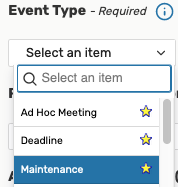
To star an event type, click on the white star icon next to the event type name anytime you see it (the star will turn yellow):
Favorite / "Starred" Resources
Making a resource a "starred" resource allows you to quickly access that resource directly from your 25Live home page. Just look for the Your Starred Resources section:
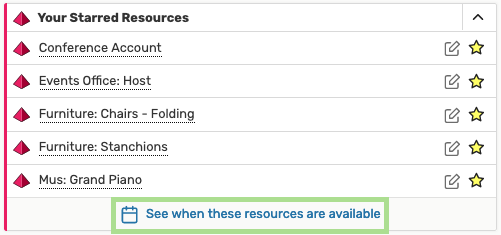
PRIO-TIP: Notice that making some resources your "starred", allows you to quickly schedule an event for these resources (by clicking on the edit icon) or to review their availability (by clicking on the See when these resources are available link at the bottom of the pagelet).
Making your favorite or most frequently used resources your "starred" resources also speeds up the process of selecting them in the Event Form because 25Live first checks the availability of your starred resources:

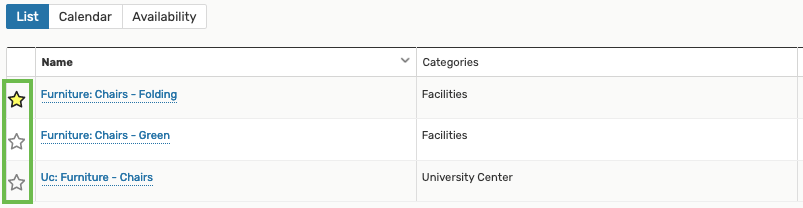
To star a resource, click on the white star icon next to the resource name anytime you see it (the star will turn yellow):
- In the Event Wizard:

- In the list of resources:
Favorite / "Starred" Reports
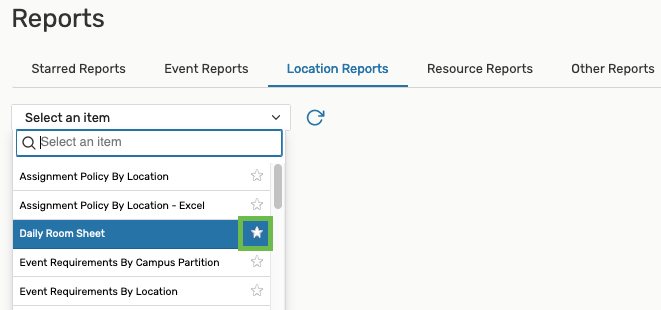
Making a report a "starred" report allows you to quickly access that report directly from your 25Live home page. Just look for the Your Starred Reports section:
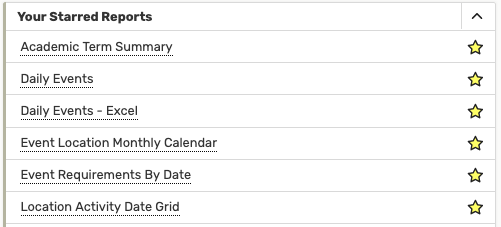
To star a report, click on the white star icon next to the report name (the star will turn yellow):
If you are responsible for managing one or more spaces and their schedules in 25Live, making sure that all of your location assignment requests are answered is of utmost importance. The default Tasks view shows you tasks with due dates within 30 days in the past and 30 days in the future.
Follow the instructions below to create a task search that will show you ALL of your outstanding tasks, regardless of their due date.
First, click on the Tasks link in the upper right corner of the application:
Then select the Reset link in the bottom right corner of the search parameters.

At the top of the page, move the toggle button to the Advanced search, then select the following search criteria:
- Task States - select the Outstanding checkbox
- Task Types - select all checkboxes: To Do Tasks, vCalendar To Do Tasks, Authorization Tasks, Notification FYIs, Assignment Tasks
- Dates - set the From parameter to Today - (minus) 365 Days and the Until parameter to Today + (plus) 365 Days
- Assigned To - select your own name in the Assigned To section
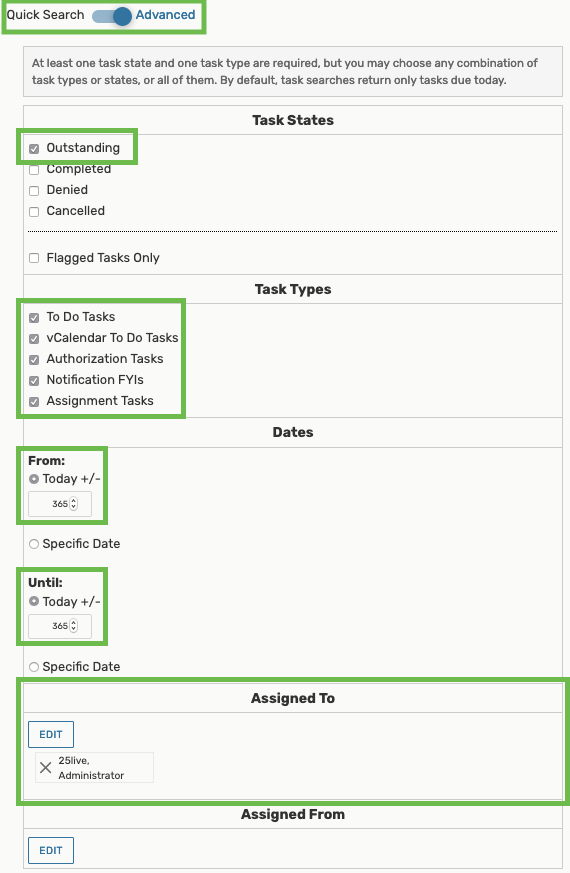
Select the Save As link in the bottom right corner of the page
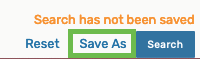
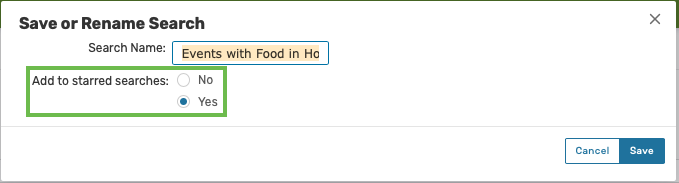
and name your search. Use a name that is informative, for example: "Administrator's Tasks". Select the Yes radio button to add this search to your starred searches. Lastly, click on the Save button in the bottom right corner of the pop-up.

Run this search periodically to ensure that none of your tasks slips through the cracks.
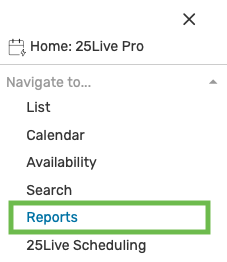
25Live has a variety of reports available to the users to allow them to analyze the event data. Below you will find instructions on how to run a few of them. To access reports in 25Live, first, click on the More button in the upper right corner of the application.
Then, from the drop-down menu of options select Reports.
You will be taken to the 25Live Report page, which is not separate from 25Live (to return to 25Live, click on the More icon, then expand the Go To Tool section and select 25Live Pro from the list of options).
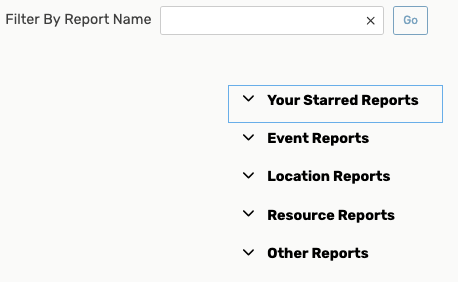
The first group of reports you will see on the report landing page is Your Starred Reports. Next, reports are organized by categories such as Events, Locations, Resources. Lastly, you will see the Other Reports group that contains reports that do not fit into one of the previous categories. You may also search for a report by entering a keyword in the Filter By Report Name search box.
Event Listing - Excel report
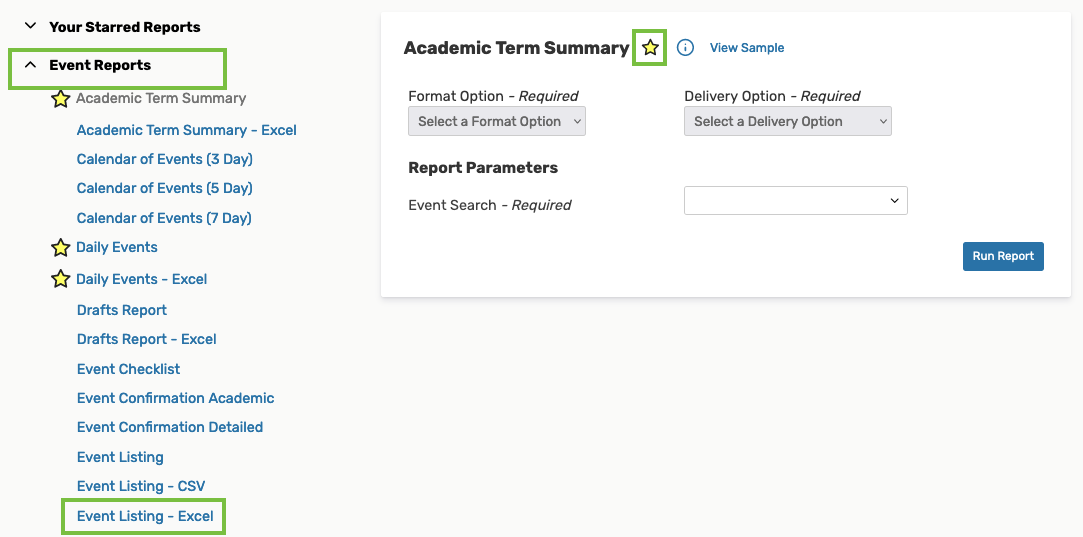
First, select the Events Reports link. Then, scroll down until you see the report of interest to you, for example, Event Listing - Excel report, and click on it.
PRO-TIP: if you expect that you will run this report frequently, click on the star icon to the right of the report name. This will add the report to Your Starred Reports section.
To run the report, select the report Format Option (e.g. Excel, CSV, PDF), select the Delivery Option (see the report now, email the report, schedule the report), then select the Event Search for which you would like to run the report. Learn how to build custom event searches. Click on the Run Report button and wait for your search results to become available.
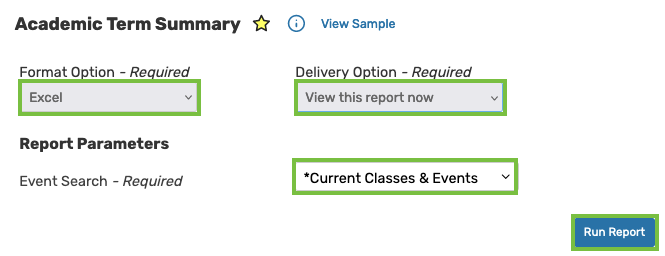
NOTE: Make sure that your pop-up blocker always allows pop-ups from 25Live. For the purpose of this example, the use of event searches with date limits is recommended.
Location Utilization - Excel report
Expand the Other Reports group. Then, select the Location Utilization - Excel report.
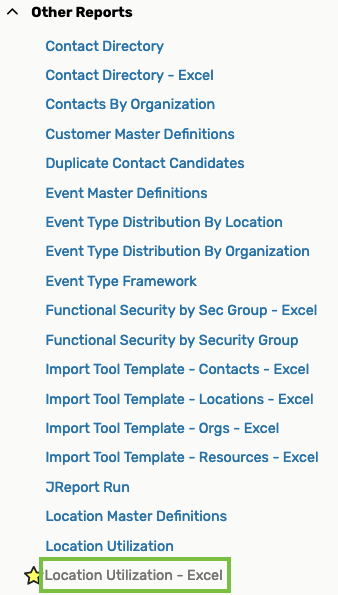
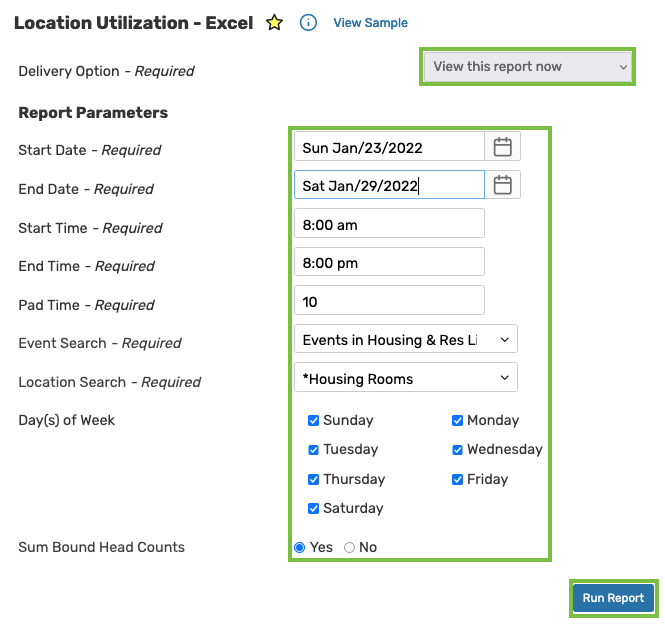
To run the report, select the report Delivery Option (see the report now, email the report, schedule the report), then enter the search parameters for your report:
- Start Date - first date of the analysis period
- End Date - last date of the analysis period
- Start Time - earliest event start time
- End Time - latest event end time
- Pad Time - the time between classes if any (10 minutes is the standard)
- Event Search - the Event Search for which you would like to run the report. Learn how to build custom event searches.
- Location Search - the Location Search for which you would like to run the report. Learn how to build custom location searches.
- Day(s) of Week - select the days of the week of interest to you (or you can leave all days checked by default)
- Sum Bound Head Counts - select the Yes button.
Lastly, click on the Run Report button and wait for your search results to become available.
NOTE: Make sure that your pop-up blocker always allows pop-ups from 25Live.
Navigate to 25Live and log in using your Humboldt user name and password.
General browsing for rooms
Select the Go to Search button in the upper right corner of the page.

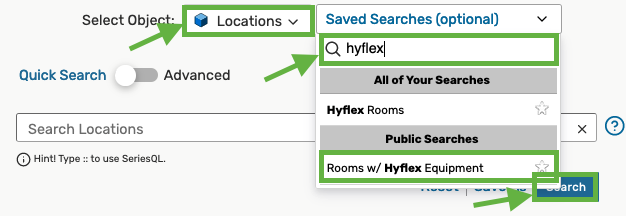
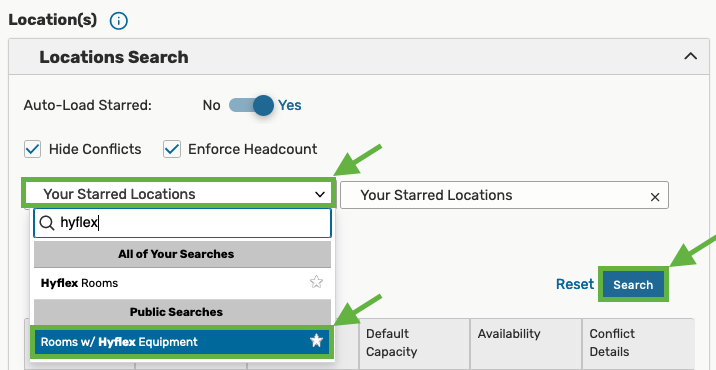
Once the search page loads, from the Select Objects dropdown menu, select Locations. Next, select the Saved Searches dropdown menu and type "hyflex" in the search field. From the list of search results, select the Rooms w/ Hyflex Equipment public location search. Lastly, select the Search button. The list of rooms with hyflex equipment will be displayed below.
If you are unable to see the Rooms w/ Hyflex Equipment search, you can create your own custom search by following the steps below.
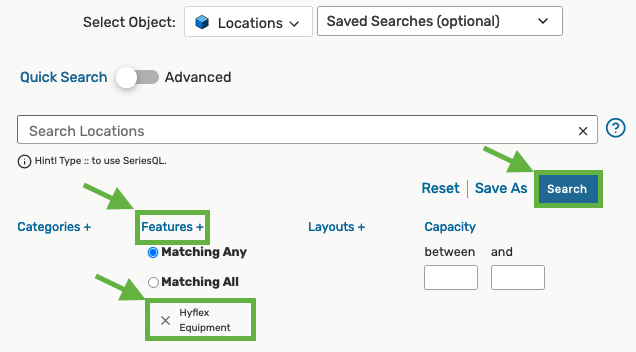
On the Location Search page, select the Features+ link, then in the list of available features select Hyflex Equipment. You may also add additional criteria, such as room Categories (e.g. lecture rooms, conference rooms, or computer labs) or room Capacity limits.
Next, select the Search button to see the rooms that match your search criteria.
You can also select the Save As link to save your search criteria for future use.
Searching for a hyflex room in the Event Form
As you are filling out the Event Form, you will arrive at the Location(s) section. In most cases, the spaces searched will automatically default to your starred locations. To change that and search for hyflex rooms, select the right-hand location search dropdown menu and type "hyflex" in the search field. From the list of search results, select the Rooms w/ Hyflex Equipment public search. Lastly, select the Search button. The list of available rooms with hyflex equipment will be displayed below. Select the room you wish to reserve and proceed with completing the event form.
You can subscribe to any of the event calendars published on the web and see the events posted to them in your Google Calendar. Follow these steps to subscribe to a sample calendar:
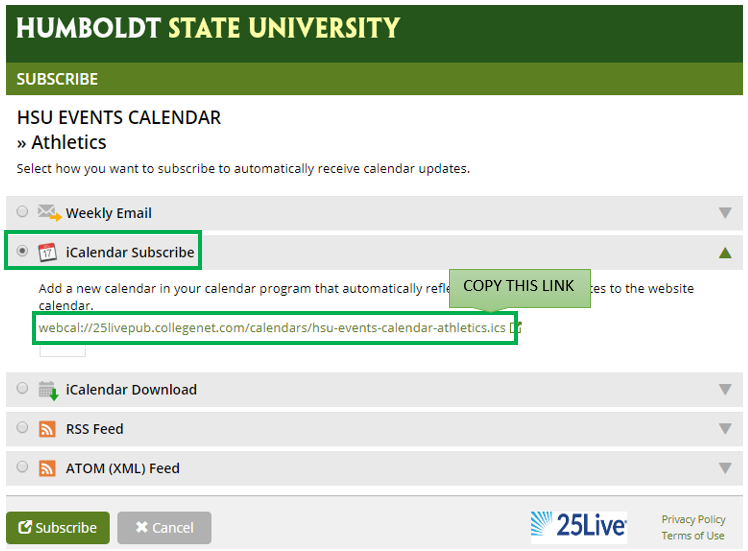
Navigate to the calendar of interest to you and click on the Subscribe icon in the upper right corner:

Make sure that your browser allows pop-ups. You should see a new window open. Select the iCalendar Subscribe radio button and copy the link listed in the section that opens. Once you copied the link, you may close this window.
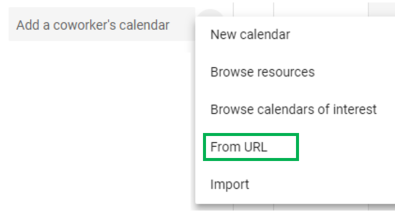
Next, navigate to your Google Calendar. In the right side column, locate the Add a coworker's calendars field and click on the plus sign to the right of it:

then select From URL option:
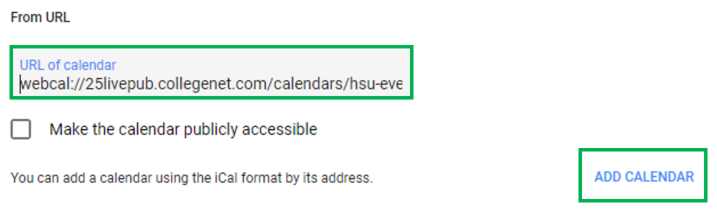
On the From URL page, in the URL of calendar field, paste the calendar link copied in step 2 of these instructions. Decide if you wish for this new calendar to be publicly accessible and check the box (or not). Next, click on the Add Calendar button.
You can now see the new calendar in your Google Calendar, Other calendars section. Notice that this is a view-only calendar. You can copy events from this calendar to your own calendar, then edit them, set notifications, etc.
Why can't I schedule an event for today?
Are you having trouble making a reservation for today? Most users are restricted to creating events at least 6 days ahead to allow room schedulers enough time to process their reservation requests. If you need to reserve a room for today, call the scheduler of that room directly.

Why can't I schedule an event for next semester?
Are you having trouble making a reservation for next semester? Most users are restricted to creating events until all classes (state and Extended Education) have been scheduled and placed in classrooms. Once all classes have been placed in classrooms, the date restriction will be lifted.
Why can't I schedule events on campus closure days?
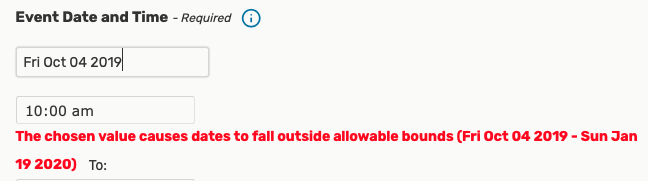
Events are generally not supposed to take place on campus closure days listed on the Green and Gold Calendar. When you schedule an event that takes place on one of the campus closure days, that date may be excluded automatically. The following message will be shown when a date has been automatically excluded from your reservation:
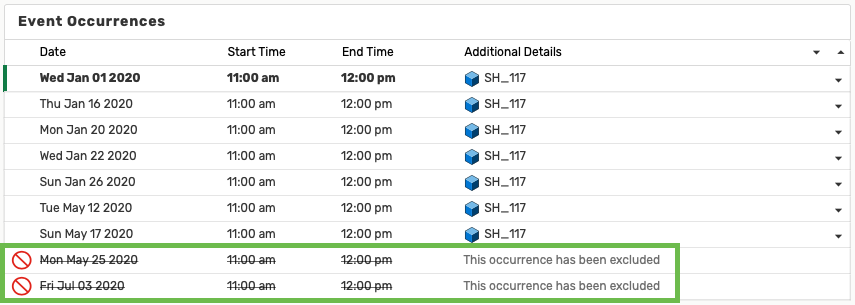
You can verify if the campus closure days have been automatically excluded from your reservation by checking the event Occurrences:
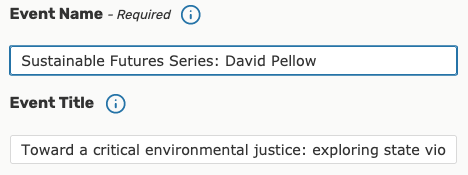
The information you enter in the Event Name field is what will define your reservation and will appear on room schedules and event calendars. The length of this field is limited to 40 characters.
When creating a new event, it is best to give it a specific, meaningful, and non-generic name. While the names "Department Meeting" or "Club Meeting" may be distinguishing enough among your own meetings, such events will be rather impossible to find among all other events named "Department Meeting" scheduled by other campus users. Perhaps, "Biology Department Faculty Meeting" or "Browncoats Club Meeting" would be better.
You may use the Event Title field to enter additional distinguishing or informative details regarding your event, for example, name of the event series this event is a part of, the title of the movie a club is watching, the title of the talk, or name of the interviewed candidate. This field allows you to enter up to 120 characters, but it is secondary to the Event Name. If you can't think of an event title - it is OK to skip this field. There is no need to copy and paste the text from the Event Name field to the Event Title field.
AVOID: typos, entering requester's name or phone number in either of these fields.
During the class schedule production and the Schedule25 room assignment process, you can check what rooms get assigned to your classes as well as double-check that the classes you placed in your departmental rooms were scheduled without conflicts. Follow the steps below to learn how to quickly search for the room assignments and how to save this search for future use.
Search for assigned rooms
First, click on the Go to Search button in the upper right corner of 25Live Pro.
Then, from the Select Object drop-down menu select Events.

Next, select the Categories link below the search window. In the pop-up window, enter the semester code (e.g. 2234 for the 2023 fall semester) in the Categories search box and hit return. You will see a list of semester codes matching your search criteria. Check the checkbox to the left of the right semester code, then click on the Done button.

Lastly, enter the class subject code in the Quick Search window, and click on the Search button to the right of it.

Once the search results display, you will see the rooms assigned to each of the classes in the far-right Locations column. If you assigned the classrooms your department controls to some of your classes, pay particular attention to the classes that do not have a classroom in 25Live - they may have lost the room due to a conflict with another class. Check the days/times/rooms you entered for these classes in PeopleSoft to double-check that you didn't accidentally place two of your classes in the same room.

Save your event search
If you think that you will be checking the room assignments frequently, you can also save this search by clicking on the Save As link:

Give your newly created event search a name that is unique and will make sense later, e.g. "Spring 2020 ART classes".
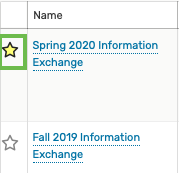
Select the Yes radio button to add this search to your starred searches. This will allow you to quickly access this search directly from your 25Live home page.
Lastly, click on the Save button in the bottom right corner of the pop-up.

If you don't have your own pictures posted on the web, you can use one of the websites below to find attractive images for your events.
MAKE SURE THAT YOU HONOR COPYRIGHTS.
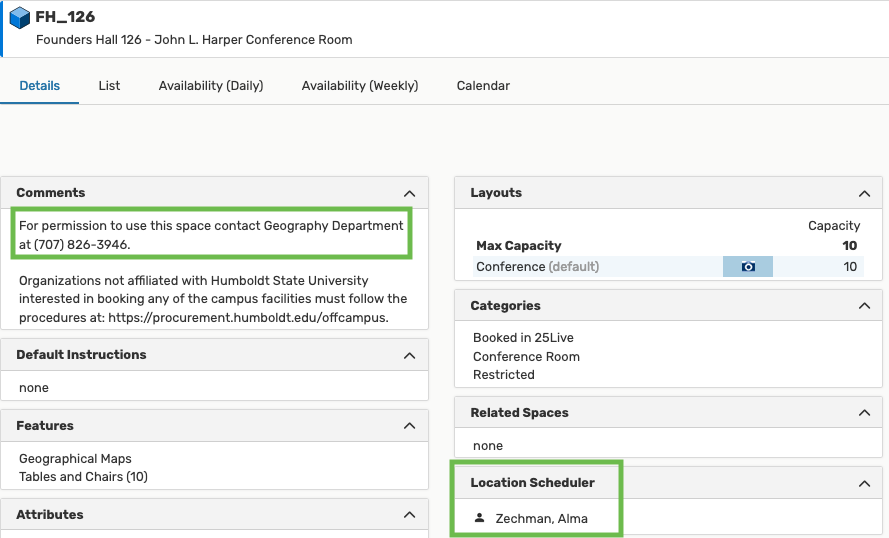
Not all users have the ability to request all locations via 25Live. Every once in a while you will come across a room that you cannot request via 25Live. But that doesn't mean that you cannot use this space. You just may need to contact its scheduler directly.
To find information on who to contact to discuss the booking of a particular room, navigate to the location Details view, then direct your gaze to:
- Comments section, where you can find the name of the office and phone number to call.
- Scheduler section, which lists the specific person responsible for reserving the room of interest to you.